Textile Design Online
By Shannon
Teacher of Visual Arts and Textiles Design

Textile Design Online
By Shannon
Teacher of Visual Arts and Textiles Design
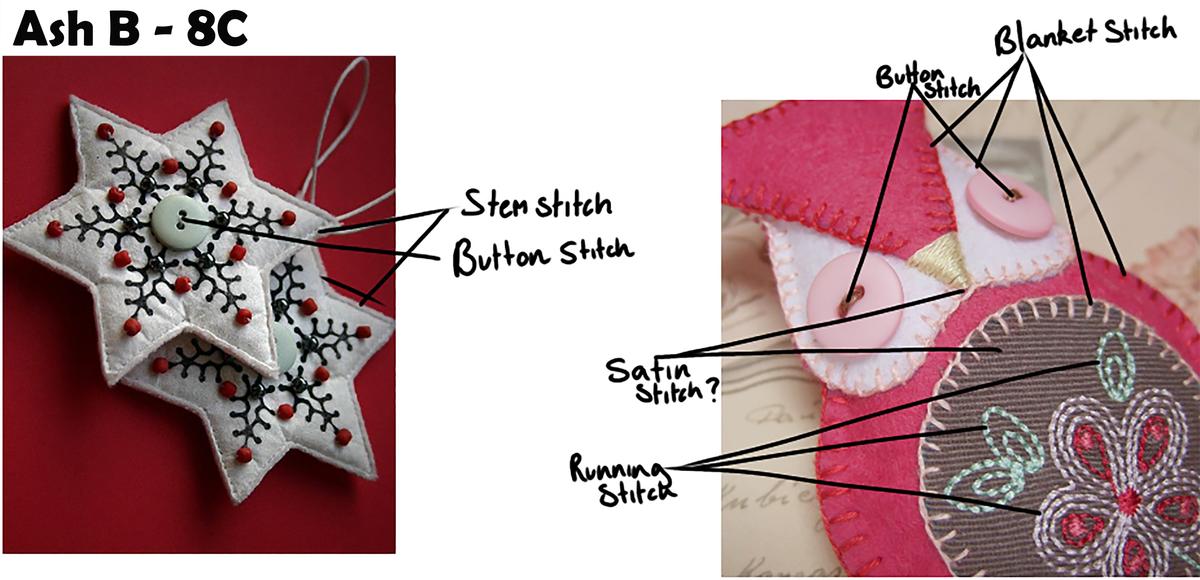
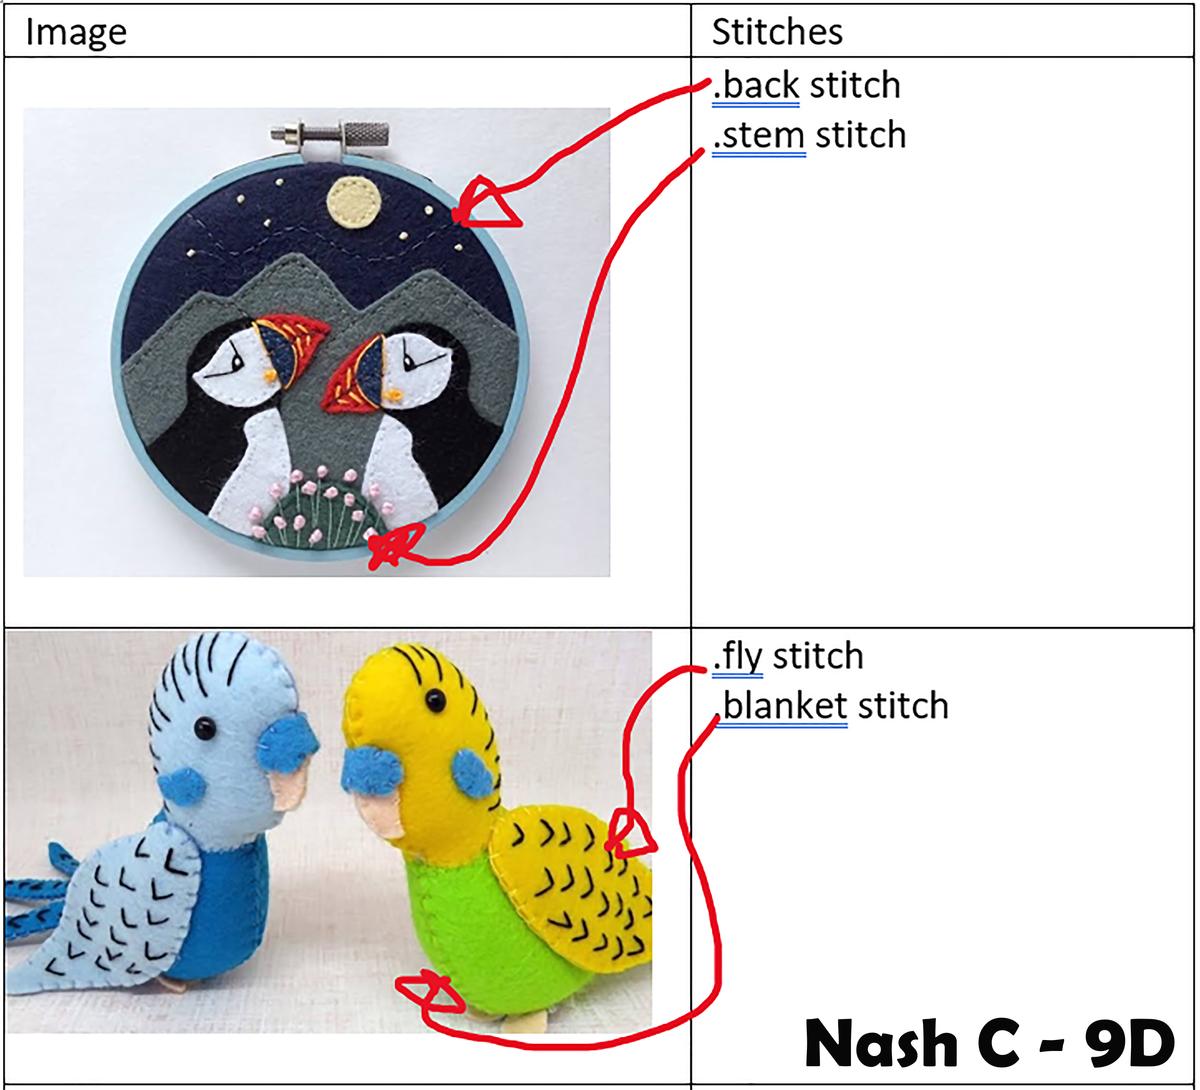
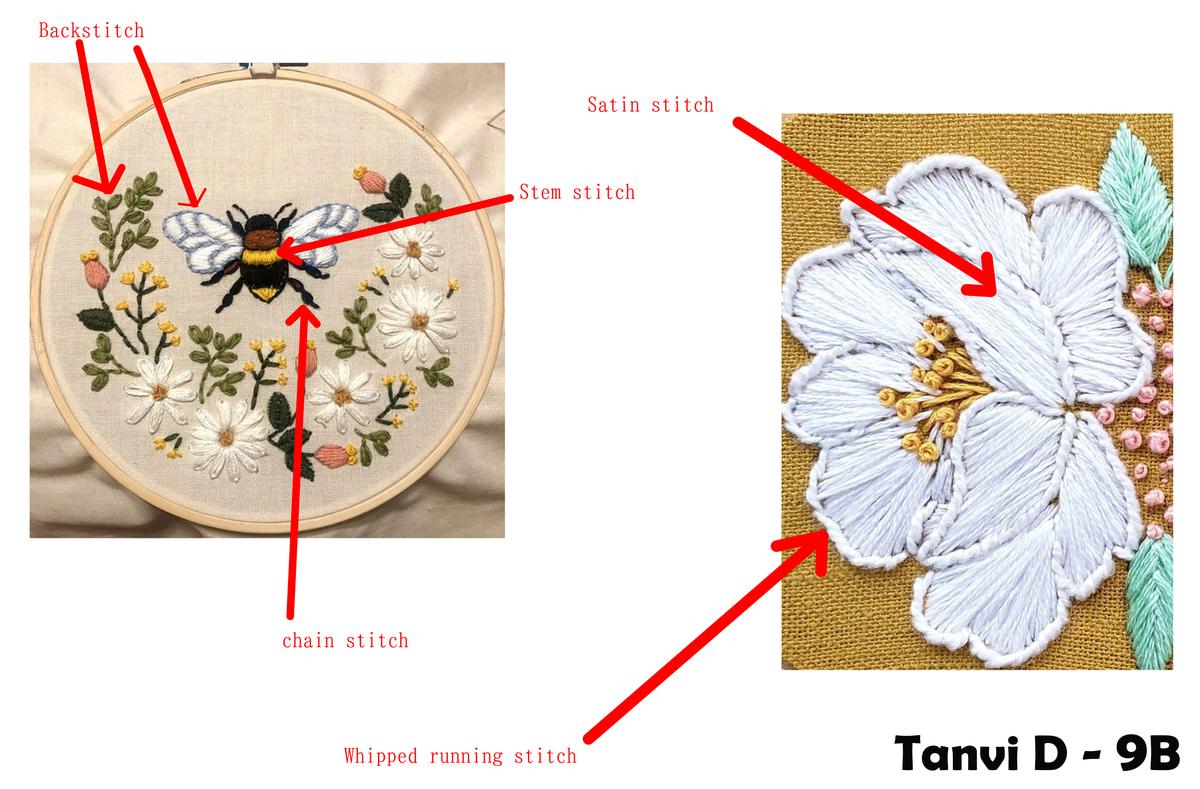
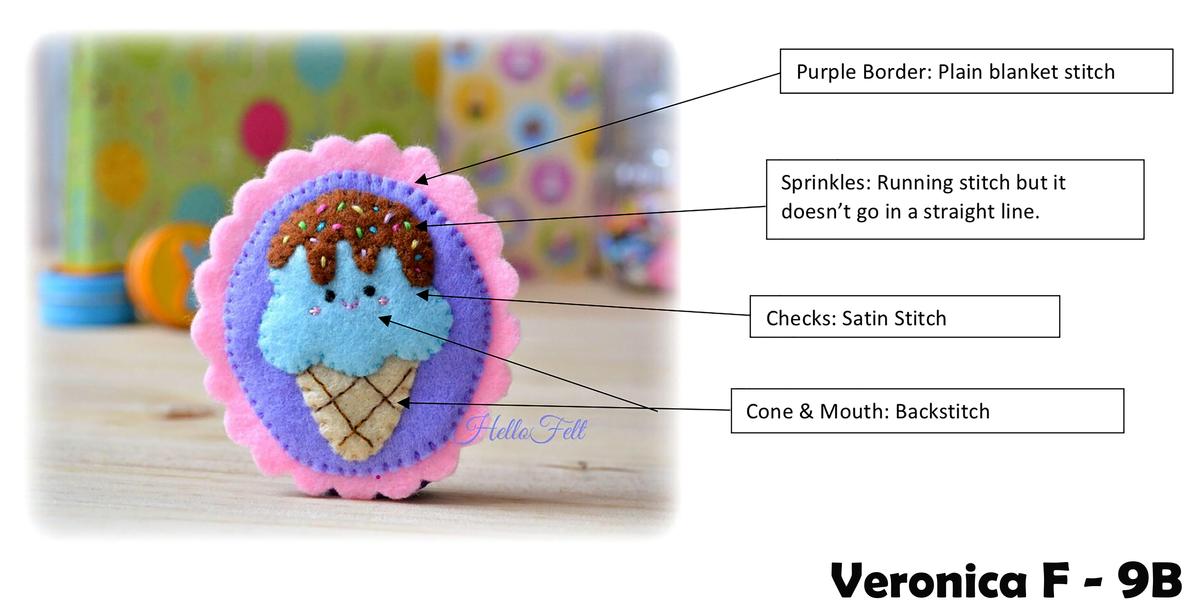
At the beginning of term 3 Textiles students started learning embroidery techniques in the classroom. When we started remote learning, students had to apply their knowledge of the stitches they practiced and identify different techniques in felt products. Students found some gorgeous examples of hand-sewn felties and demonstrated sound knowledge of embroidery techniques. This task will be useful when we return to school so students can plan how they will construct their own felt products.
When you are a Textiles student in lockdown, why not make a face mask? Student put their new skills to the test to construct their own face mask from materials at home. We discussed sustainability and landfill, this is a great project to discover how to reuse items or fabric to give them a new life. There are many ways to make face masks, such as a no-sew sock mask, and hand-sewing or machine sewing following a pattern. Some students were quite innovative in using items such as hair elastics to create the ear elastics. It was nice to see repurposed items and all the funky fabric!
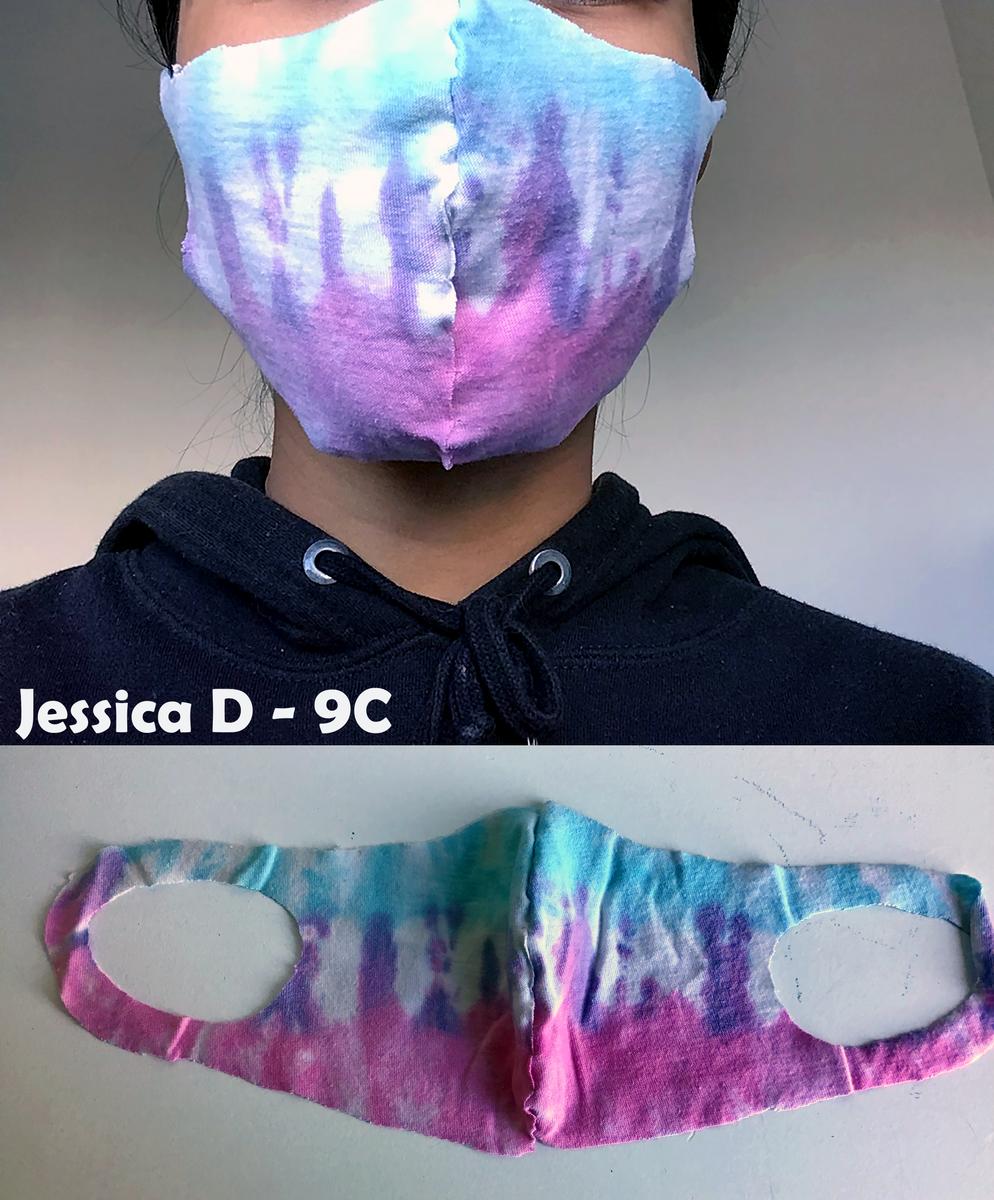
I used an old T-shirt to create a basic sew mask. I traced out a mask shape to create a pattern, cut the two pieces out, then used blanket stitch to sew them together. The challenging part was doing the blanket stitch and making sure the fabrics were aligned. I was proud of the overall product and how it turned out. Jessica D
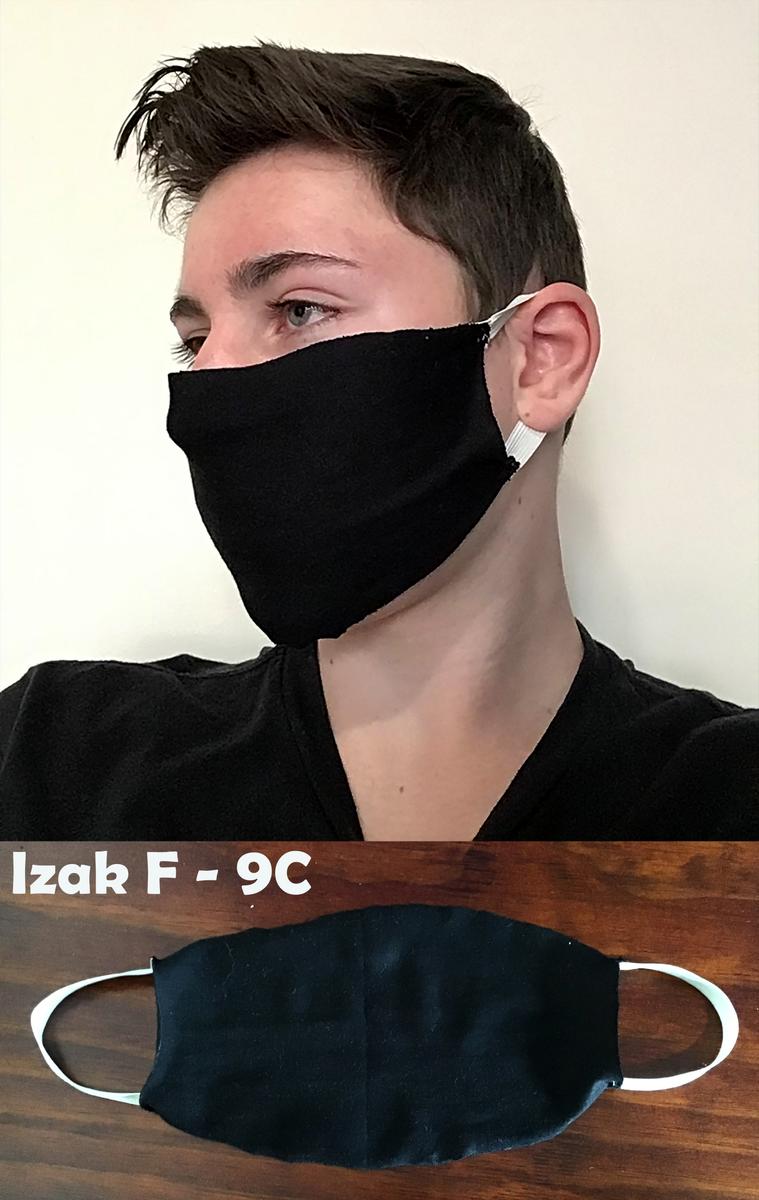
I created a face mask out of an old shirt sleeve and some fabric bands. I first did a paper template of what I wanted the body to look like, then using chalk I traced it onto the fabric, cut it out, cleaned up any rough edges, then hand-sewed the fabric and made sure it was tight so the mask fit my face. I’m proud that I recycled my old shirt to create it into something new and useable. Izak F
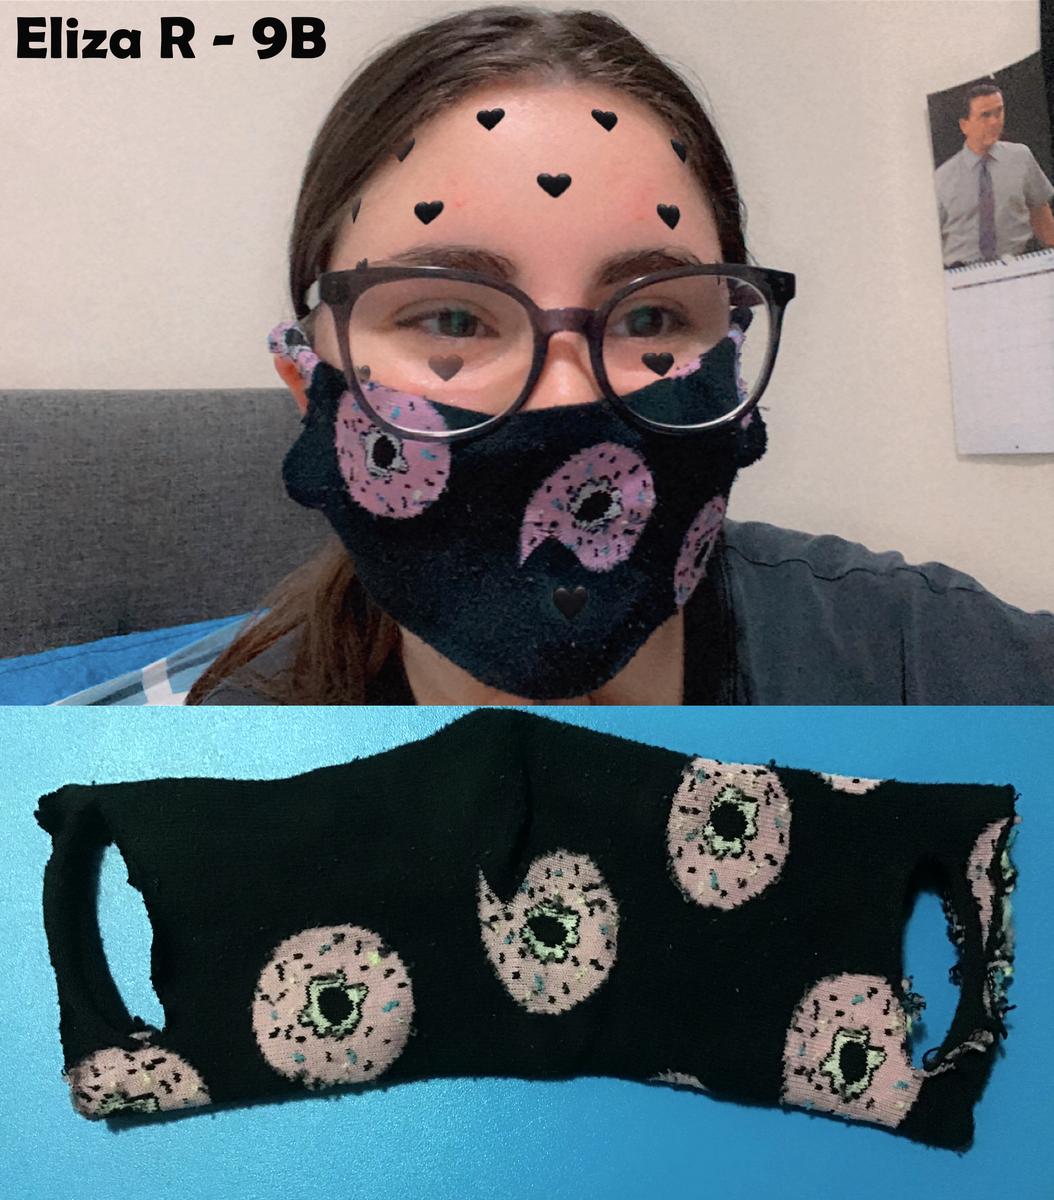
I created a no sew sock mask. What makes my mask unique is the fabric, I used donut socks. It was challenging to make this mask because when cutting the ear straps, you have to cut in the correct place or the whole mask falls apart. I am proud of the fact that it fits and is a working mask. Eliza R
Textiles student put their science suits on for Science Week and performed some Textiles Testing at home. Textile Testing is a scientific method to evaluate whether the quality of textiles meets the requirements of the specified standards needed for a product, such as checking the quality of the material and investigating faults. Student had to gather different fabrics to do two experiments, firstly to discover if the fabric was synthetic or natural, and secondly, how water resistant it is. Students were asked to organise their results in a comparative table and reflect on what they discovered.

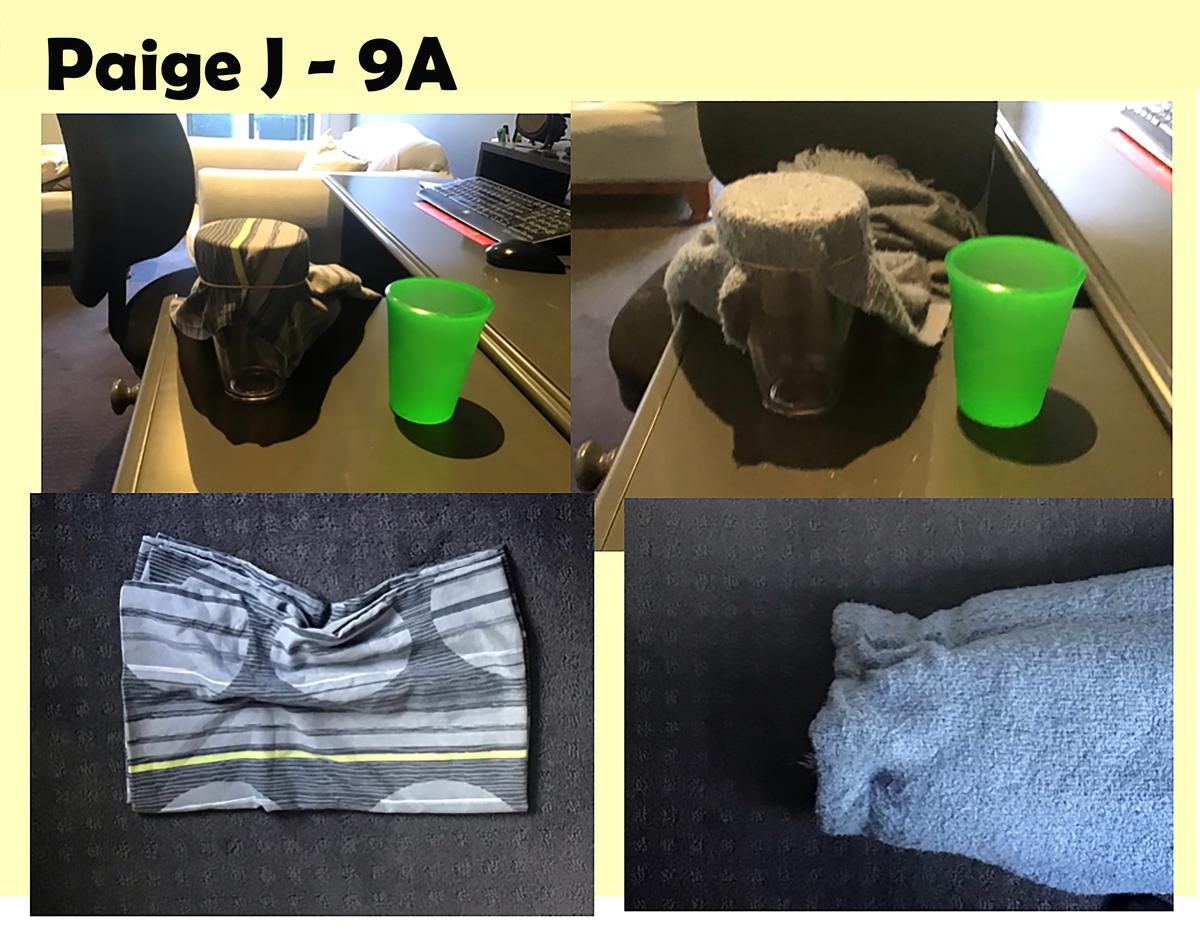
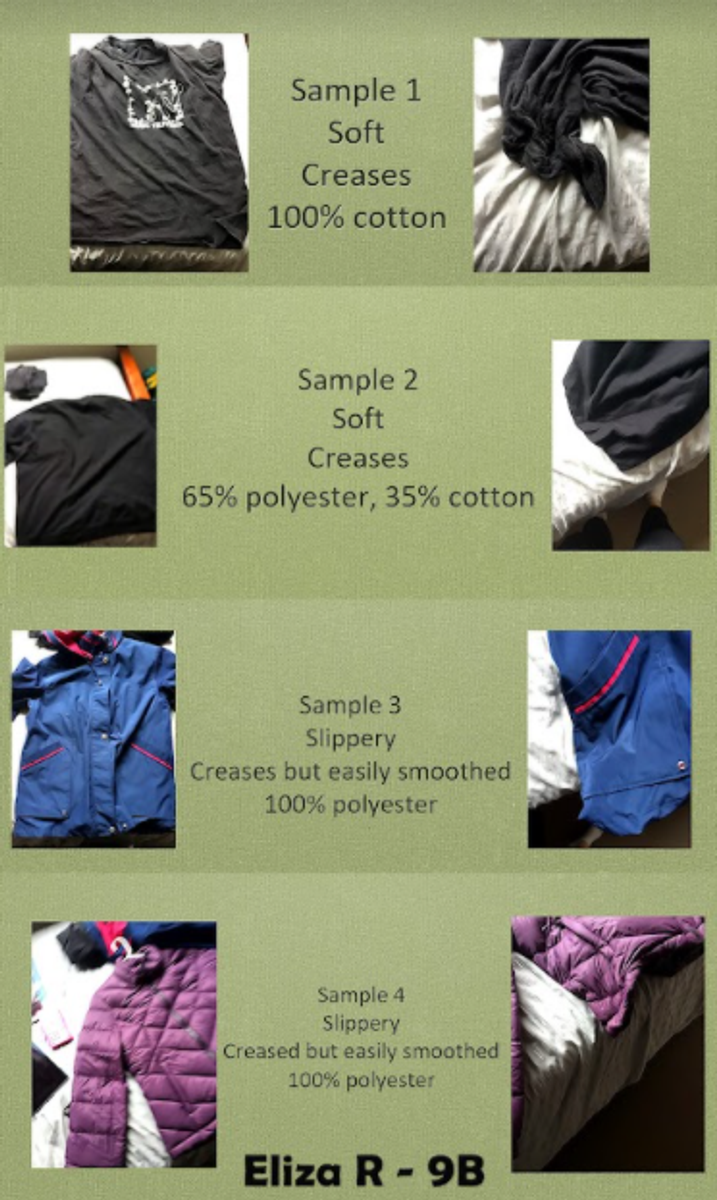
Fabric testing is several tests to see whether a material is useable or not, this is extremely important in the textiles industry because it determines if a material is useable or if a toy is going to fall apart; it helps determine the quality of a fabric and it’s an essential part of the textile industry. The test I performed was the scrunch test. The shiny/slippery materials were both 100% polyester and they both smoothed themselves out in a few seconds. The soft materials were both cotton and held their creases. Something I will remember is how to do the scrunch test so if I need to buy fabric and want to check the quality then I can use the scrunch test. Eliza R
Fabric testing is measuring the quality of a fabric by its durability or quality. It’s crucial to the industry for sales. For example, if you gave a client a cheap cotton dress, they would come back in a few days saying they need a new one because it didn’t last. This would be bad for business as it can dispel customers, potentially irritating them. My comparisons and results matched up with both of the tests! Overall the cotton ones were less durable. At first, I made a few mistakes. I did it on a surface that wasn’t flat, covered the glass with the cloth, had bad lighting. But I improved it in the final one. I really had fun recording it, I think it’s always cool to see time lapses and how water dissolves. Tanvi D
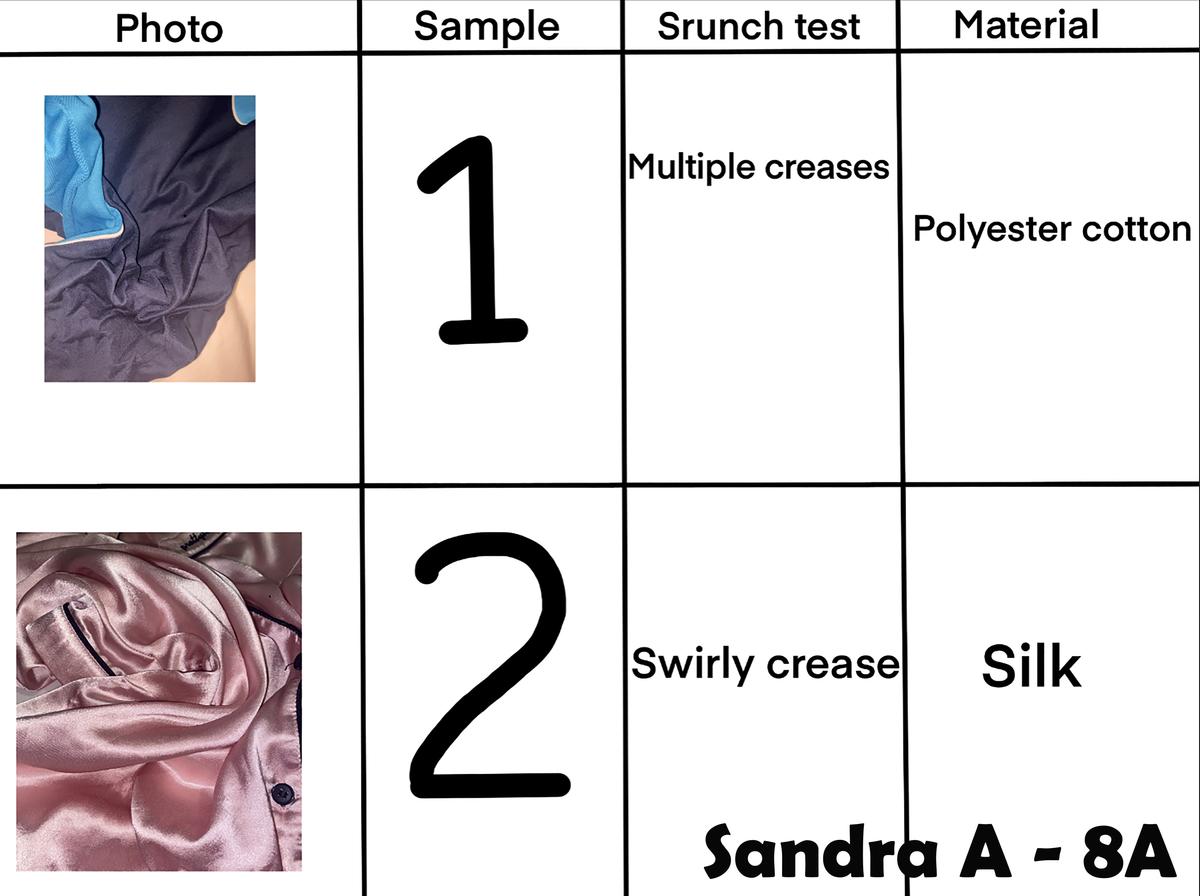
I preformed the scrunch test. I held the t shirt in my hand for 20 seconds and realised in gently out of my hands so that I can get the best results. With the silky t-shirt, it held its swirly scrunch but it was easy to remove it. On the other hand, with the polyester t-shirt it held its scrunch and was harder to remove and probably required heat to get it back to its original form. I found that the actual results of the scrunch were quite interesting because I didn’t expect it to look like it did. I have learnt that even 20 seconds of my body heat can change the form of a t shirt and make it crinkled. Which I also found quite cool and interesting. Sandra A
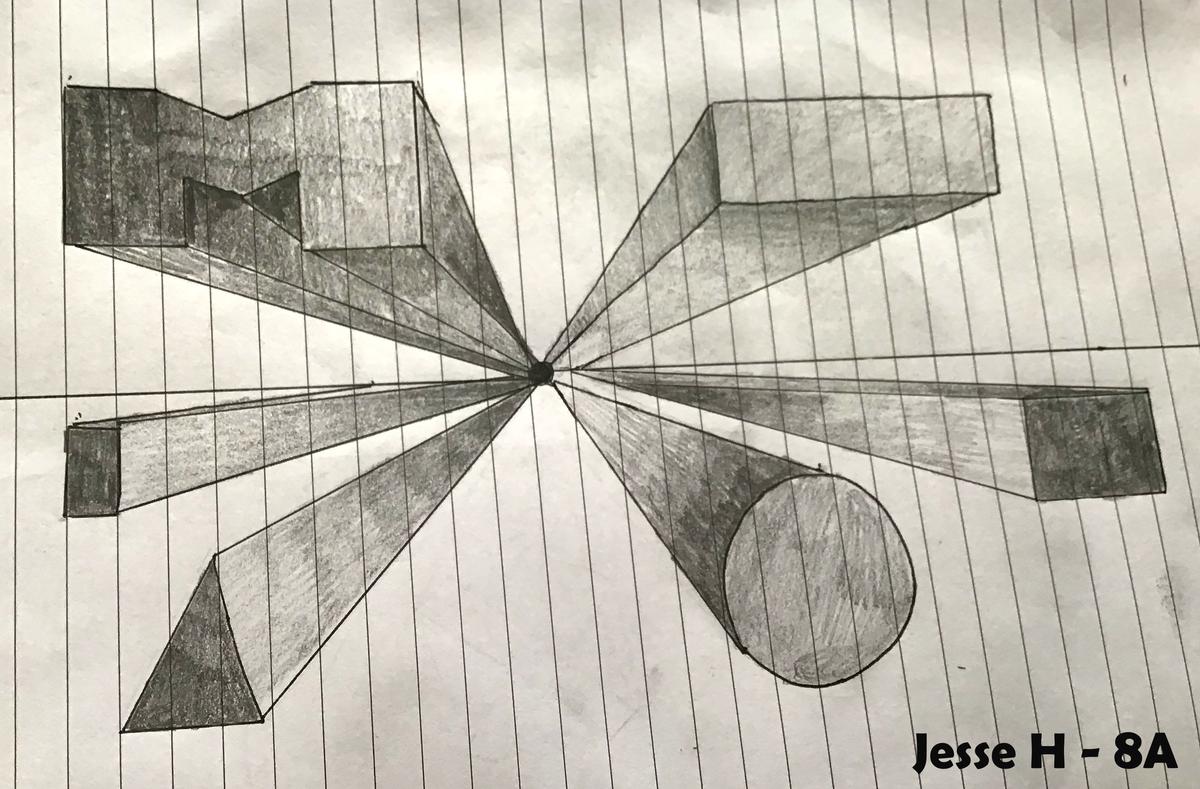
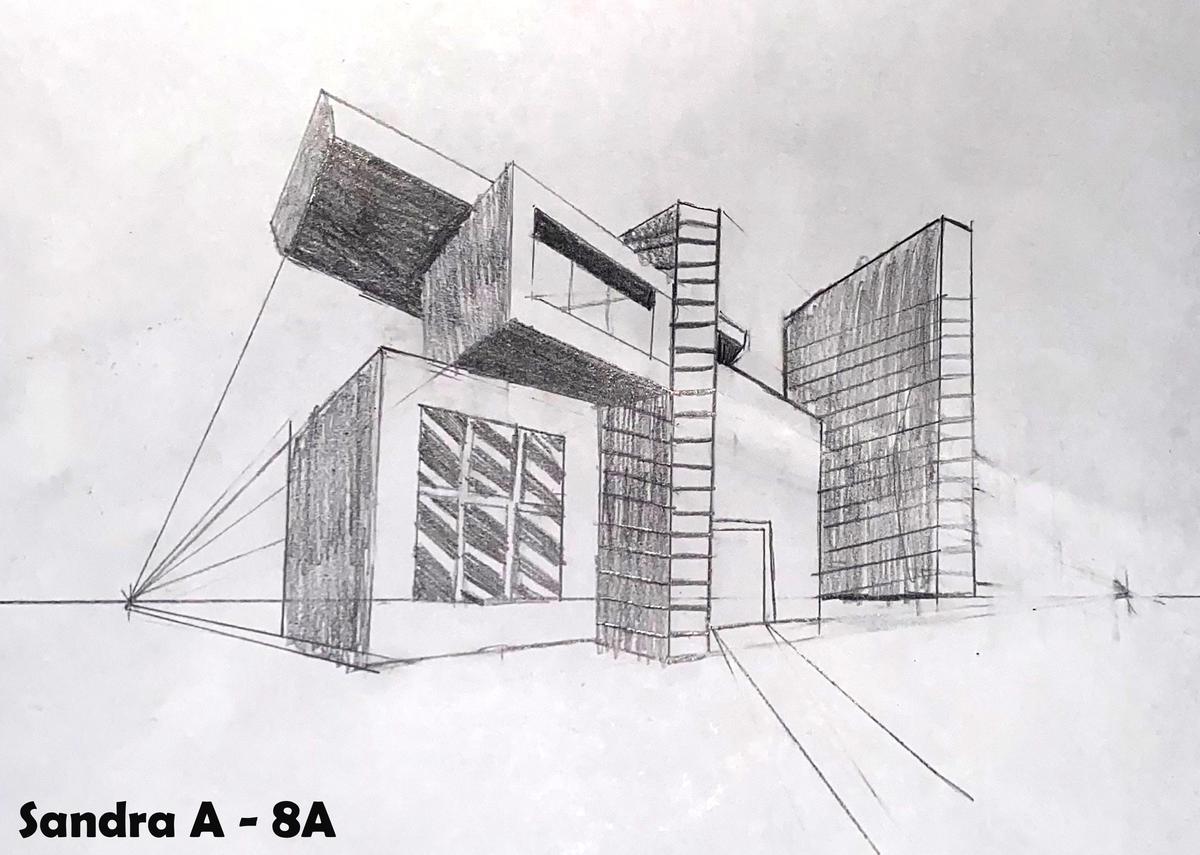
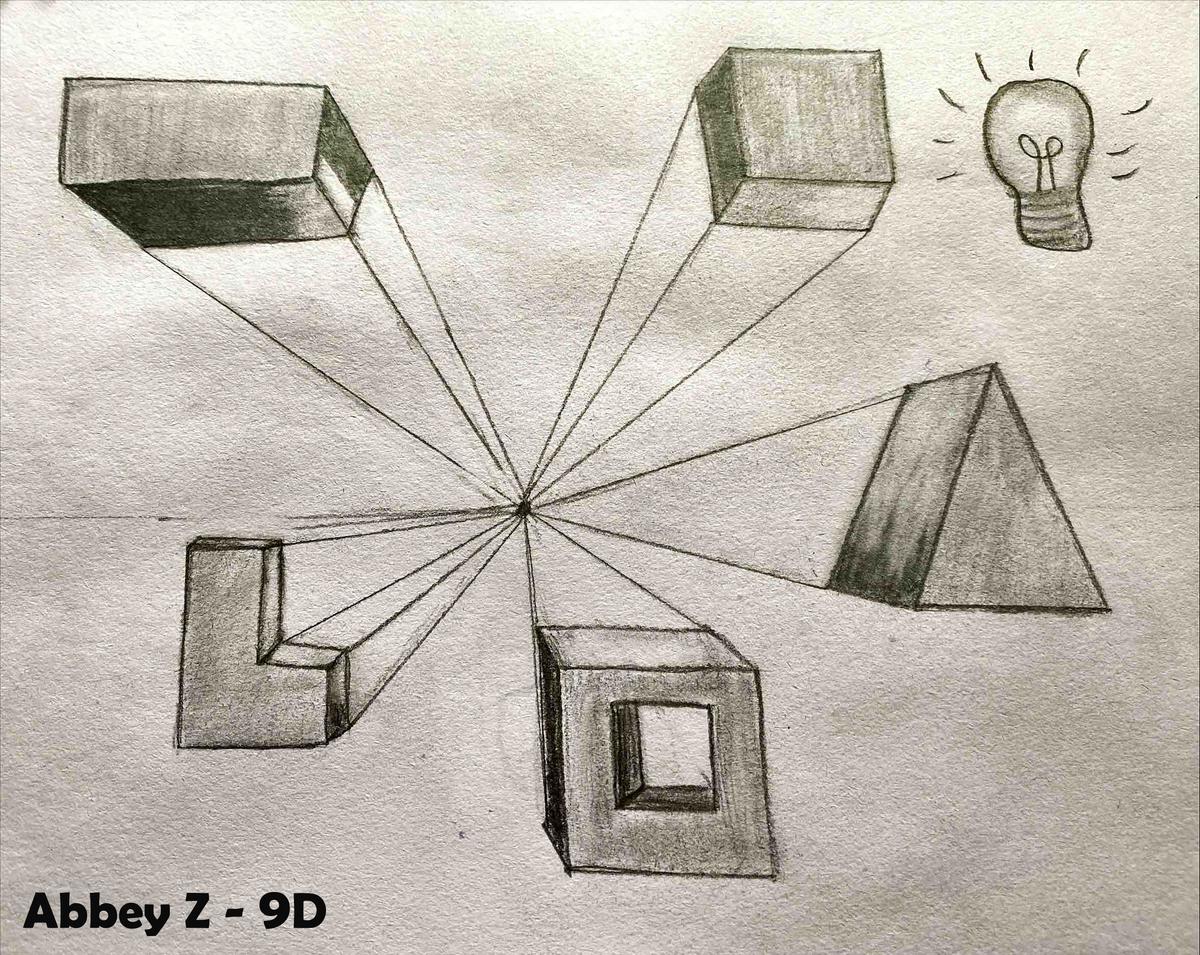
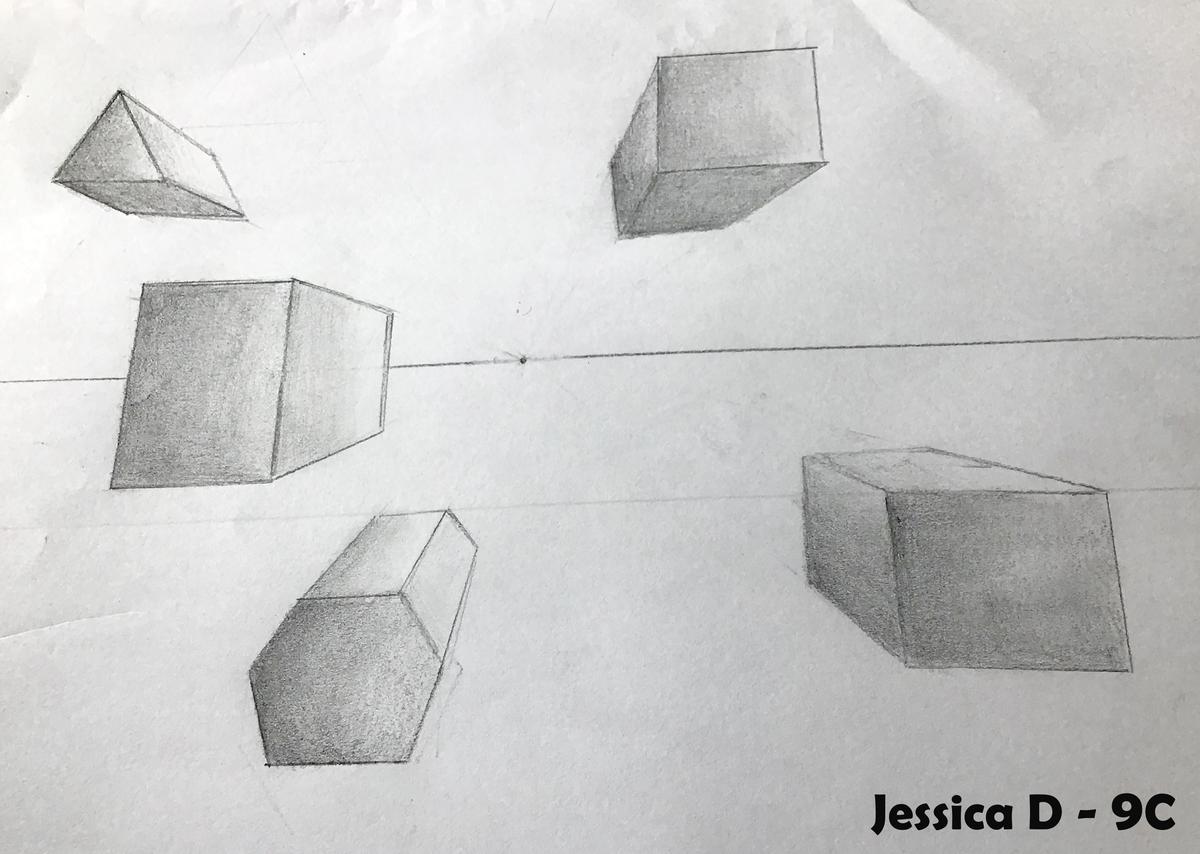
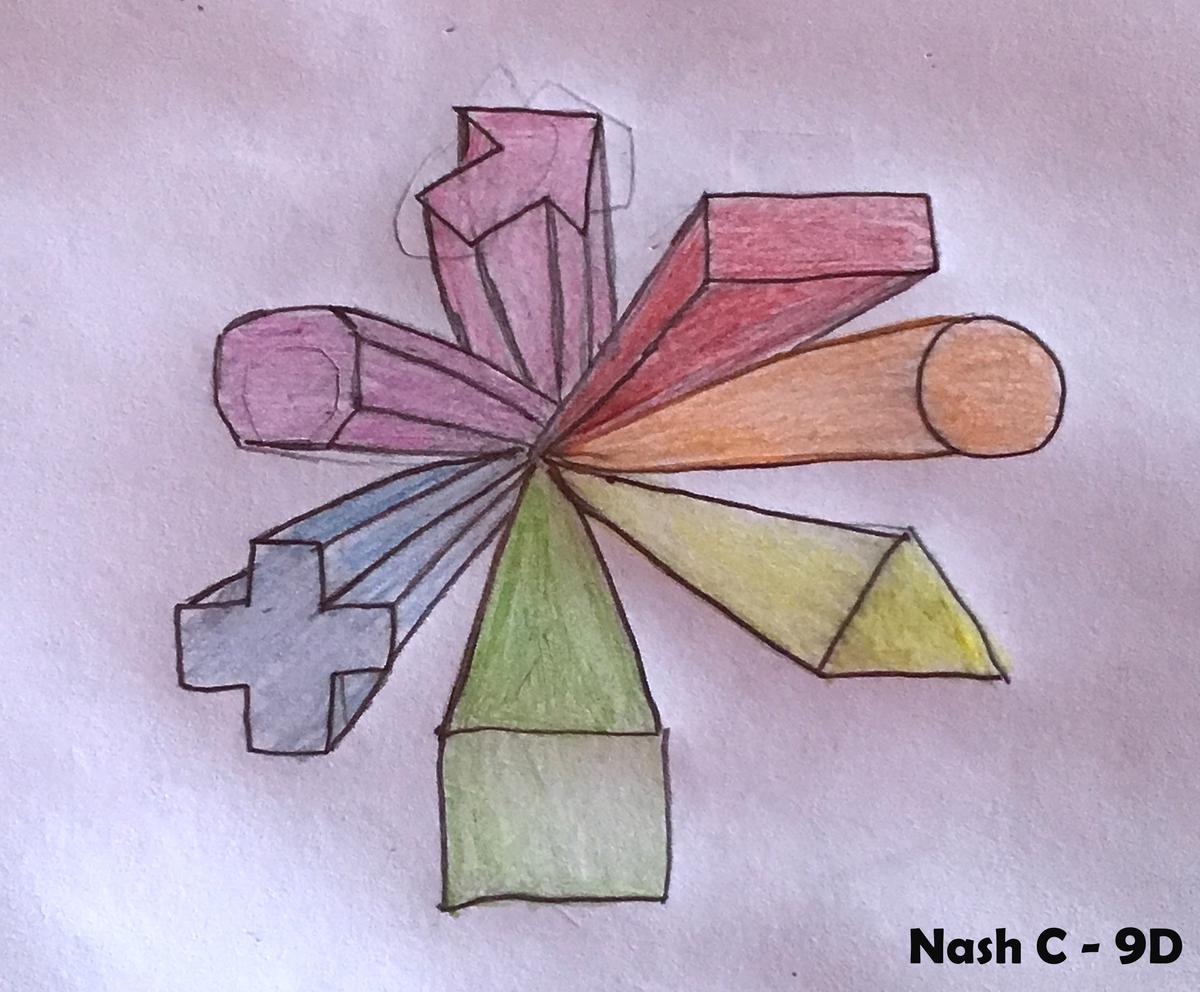
Students practiced their Design drawing skills and illustrated shapes following the rules of 1-Point Perspective. This kind of drawing is like magic, where the designer makes a 2D drawing appear to have depth and look 3D! Instrumental drawing a mathematical approach and is often used for interior and architecture design. It is also challenging, because if you draw one line incorrectly it can throw off your whole drawing. We discussed how the horizon line represents our eye sight and the vanishing point is where all the shapes appear to recede towards in the distance, students then had to follow these rules in their own drawings. I was so impressed with the students work, some extended themselves and drew in 2-Point Perspective!