
Technology Happy Challenge

Two weeks ago I felt the Tech classes were tapering with screen boredom so I threw them a watered done version of the balloon car challenge, being the ‘ta da’, you guessed it TECHNOLOGY HAPPY CHALLENGE.
Below are some fantastic examples of students' work that rose up to my challenge.
Absolutely amazing! Well done!

Bradley Cooke
Technology Teacher
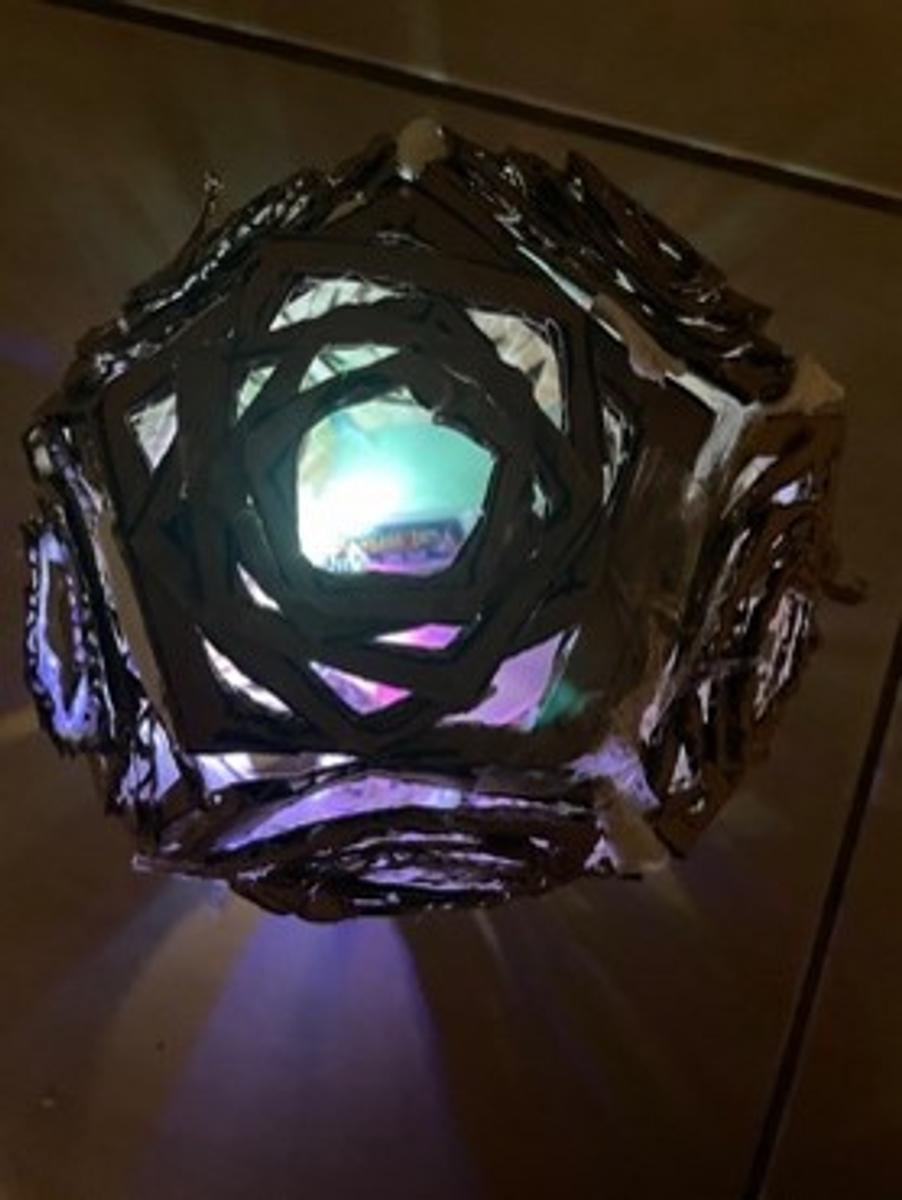
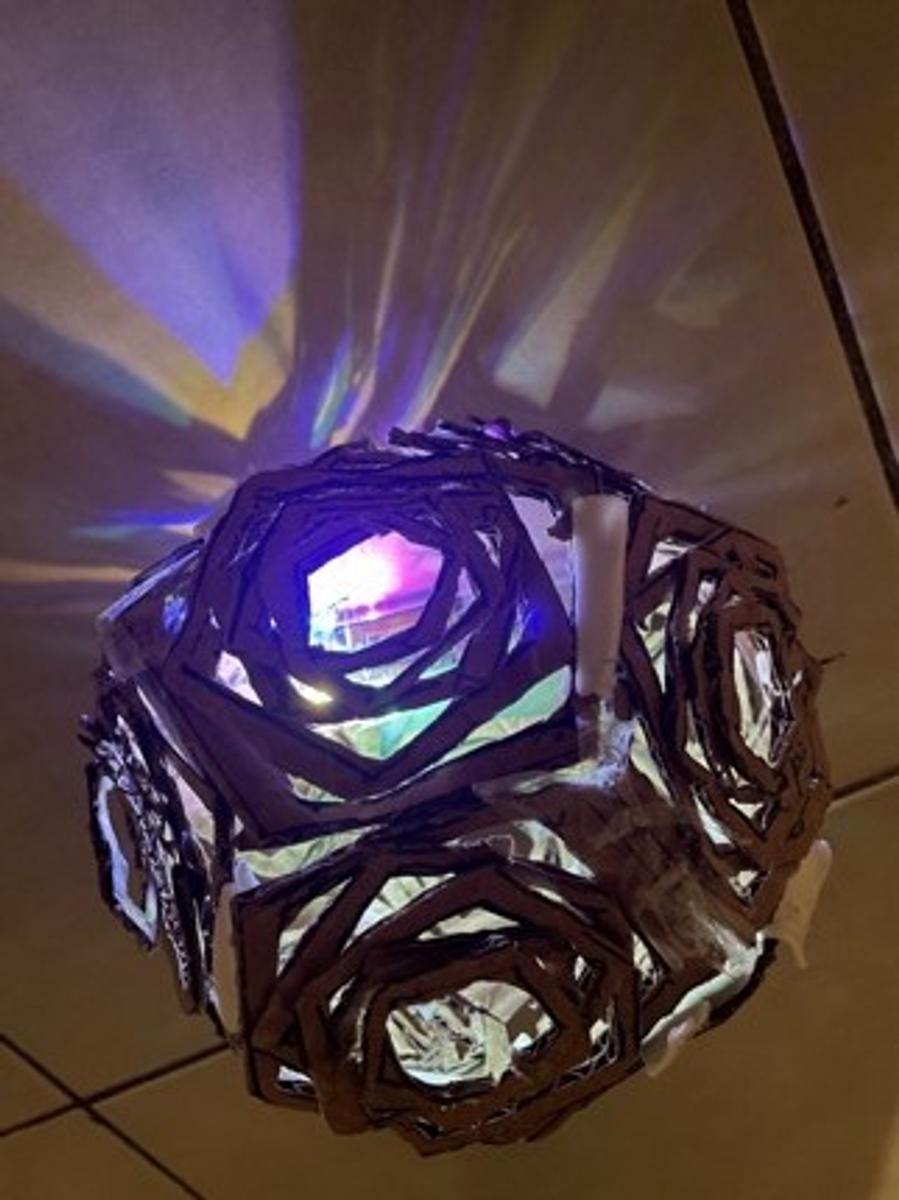
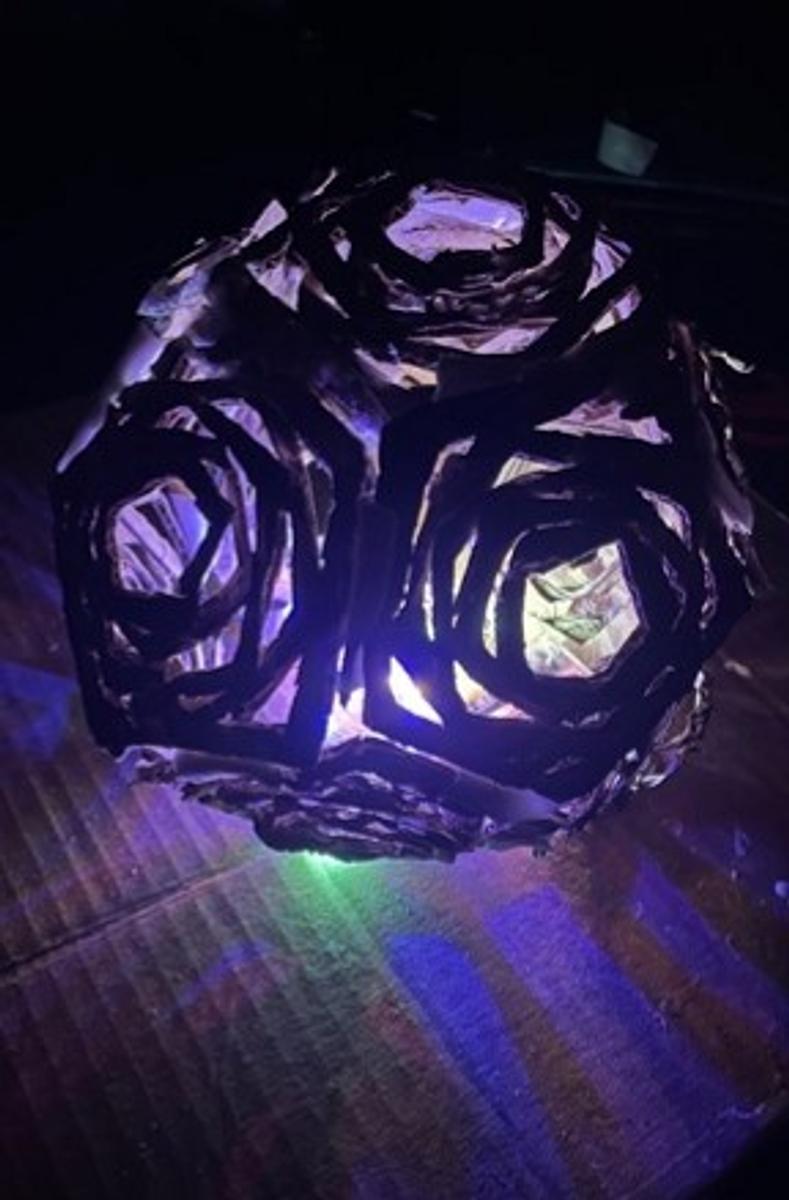
CARDBOARD LAMP SHADE
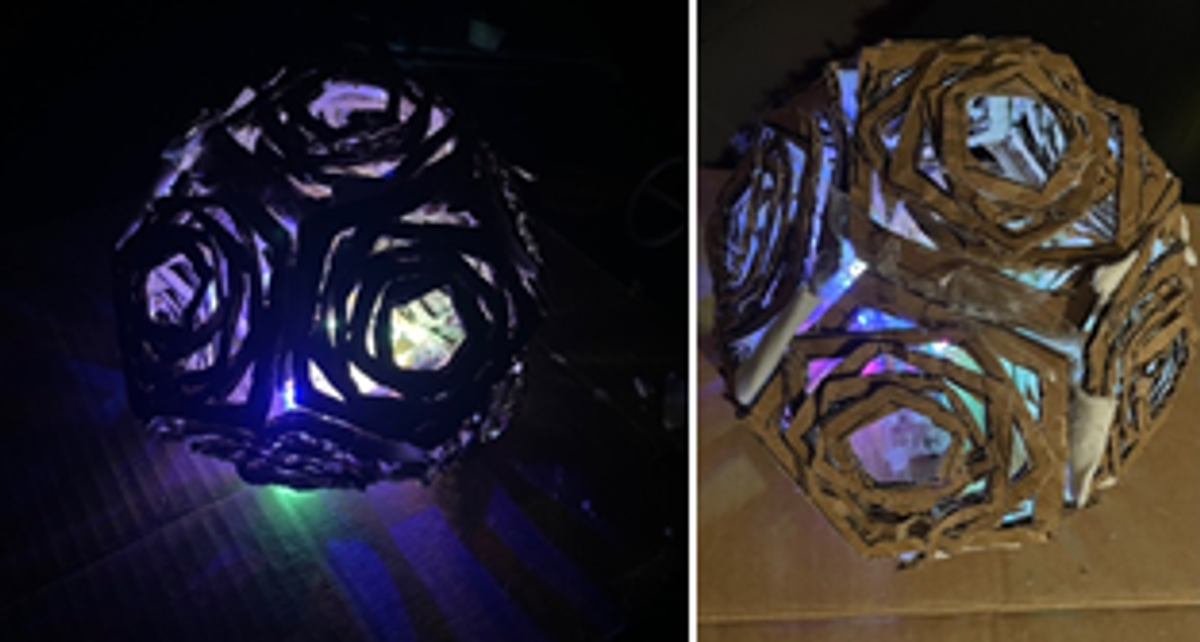
Product – Cardboard Lamp Shade
Materials – Cardboard, sharp knife, PVA glue, double sided tape, light/light bulb, scissors, ruler.
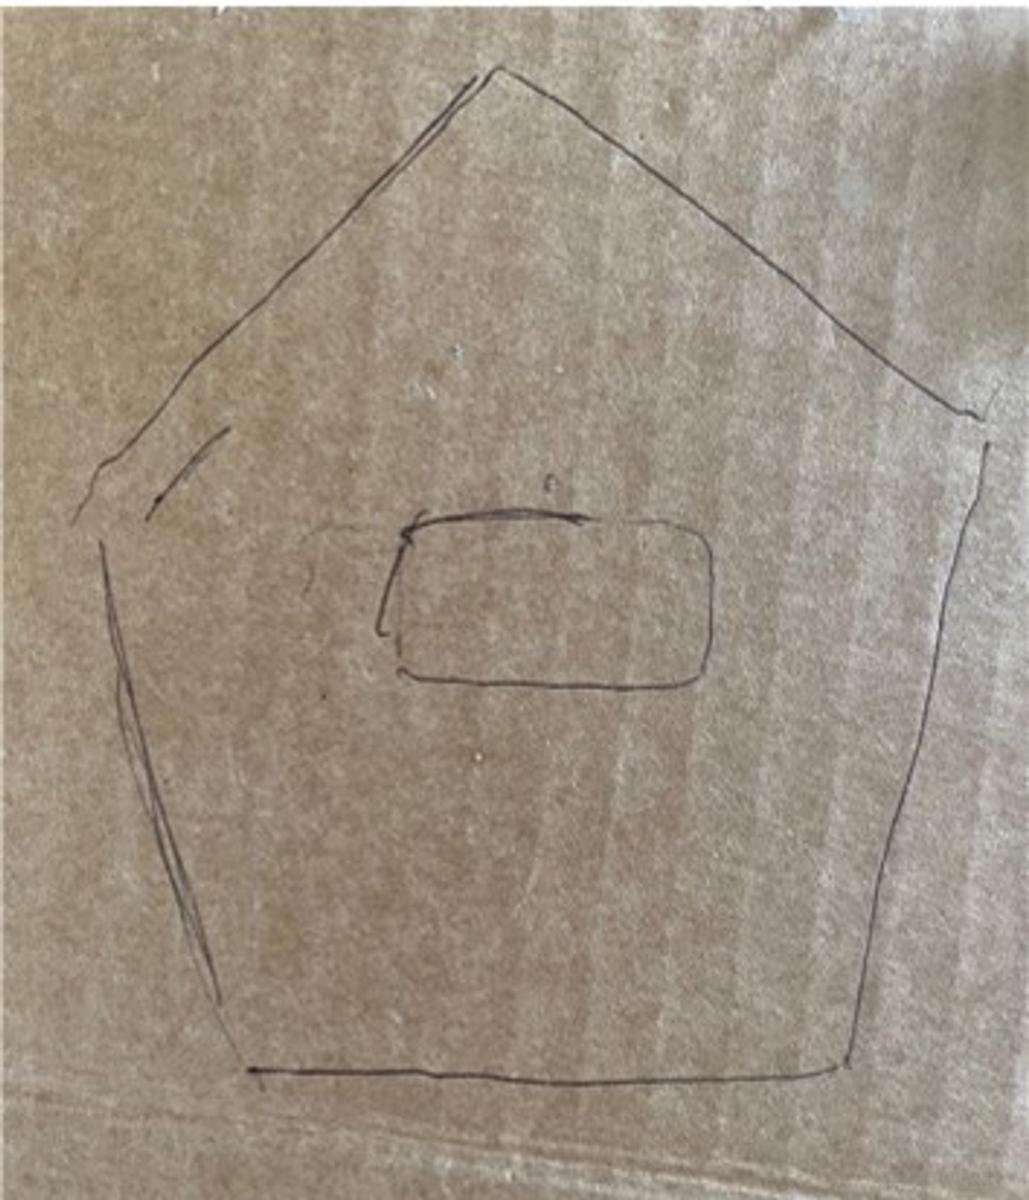
Sketches –

Safety Precautions -
- Keep hands away from knives and scissors while cutting.
- Don’t touch the sticky part of the double-sided tape.
- Don’t stab your fingers while making the cuts in the cardboard.
Methods –
- Cutting
- Gluing
- Assembling
Finishes –
- Inserting Light
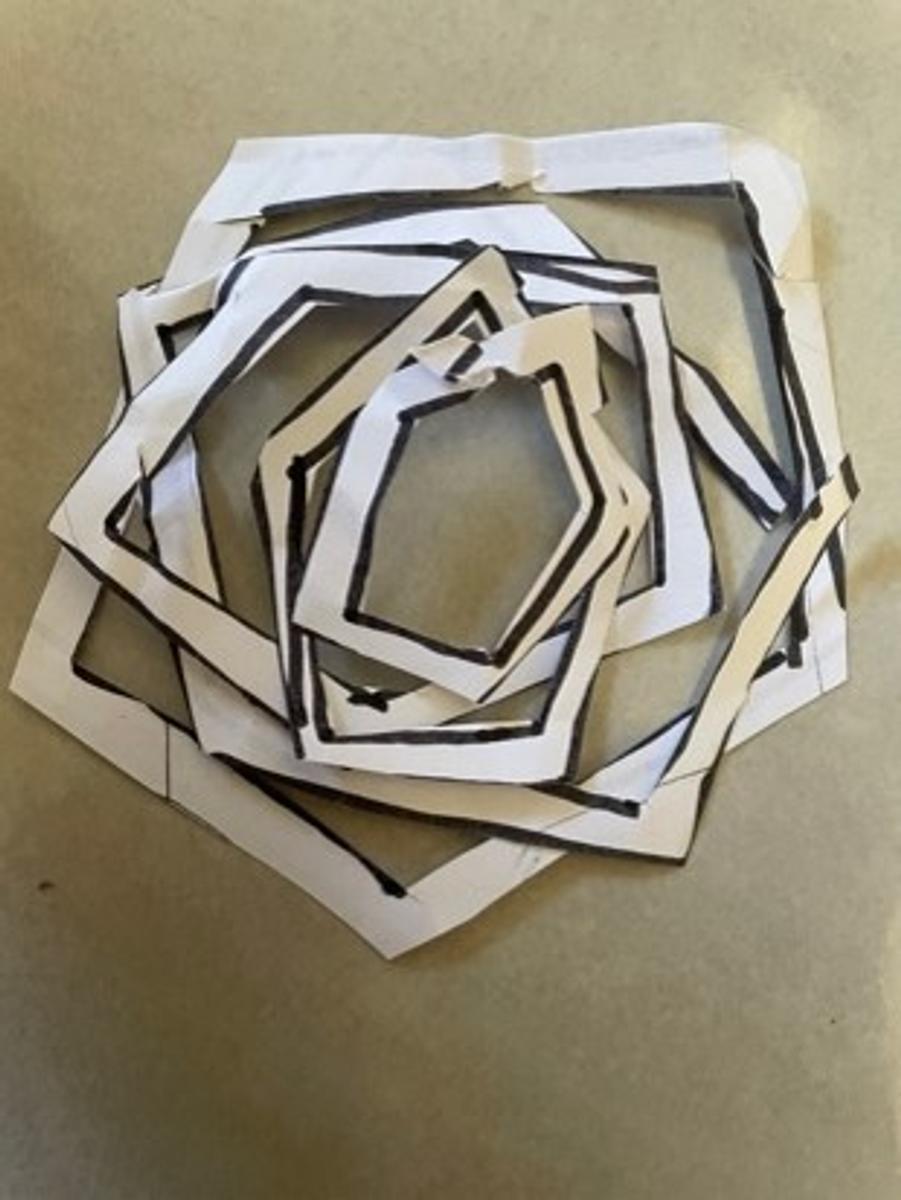
Instructions – (Examples done with paper)
Step 1
Get a piece of cardboard and on it draw 11 regular pentagons, (each side is 6cm long)

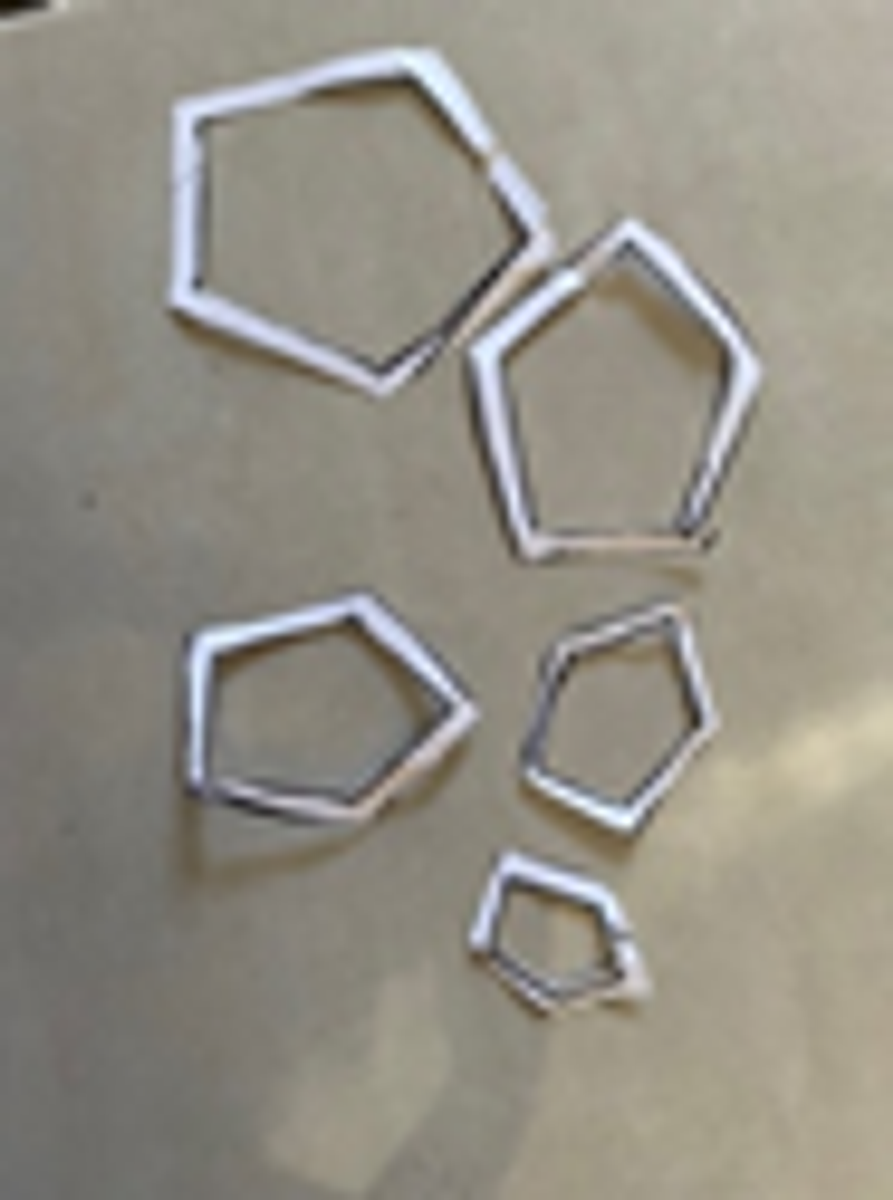

Step 2 Step 3 Step 4 & 5
Inside each pentagon, Cut out each of the Lay each shape on top
draw 5 smaller pentagons shapes. of each other.
which are 6mm smaller Continue making each shape
each time. until all 11 pieces are like this.

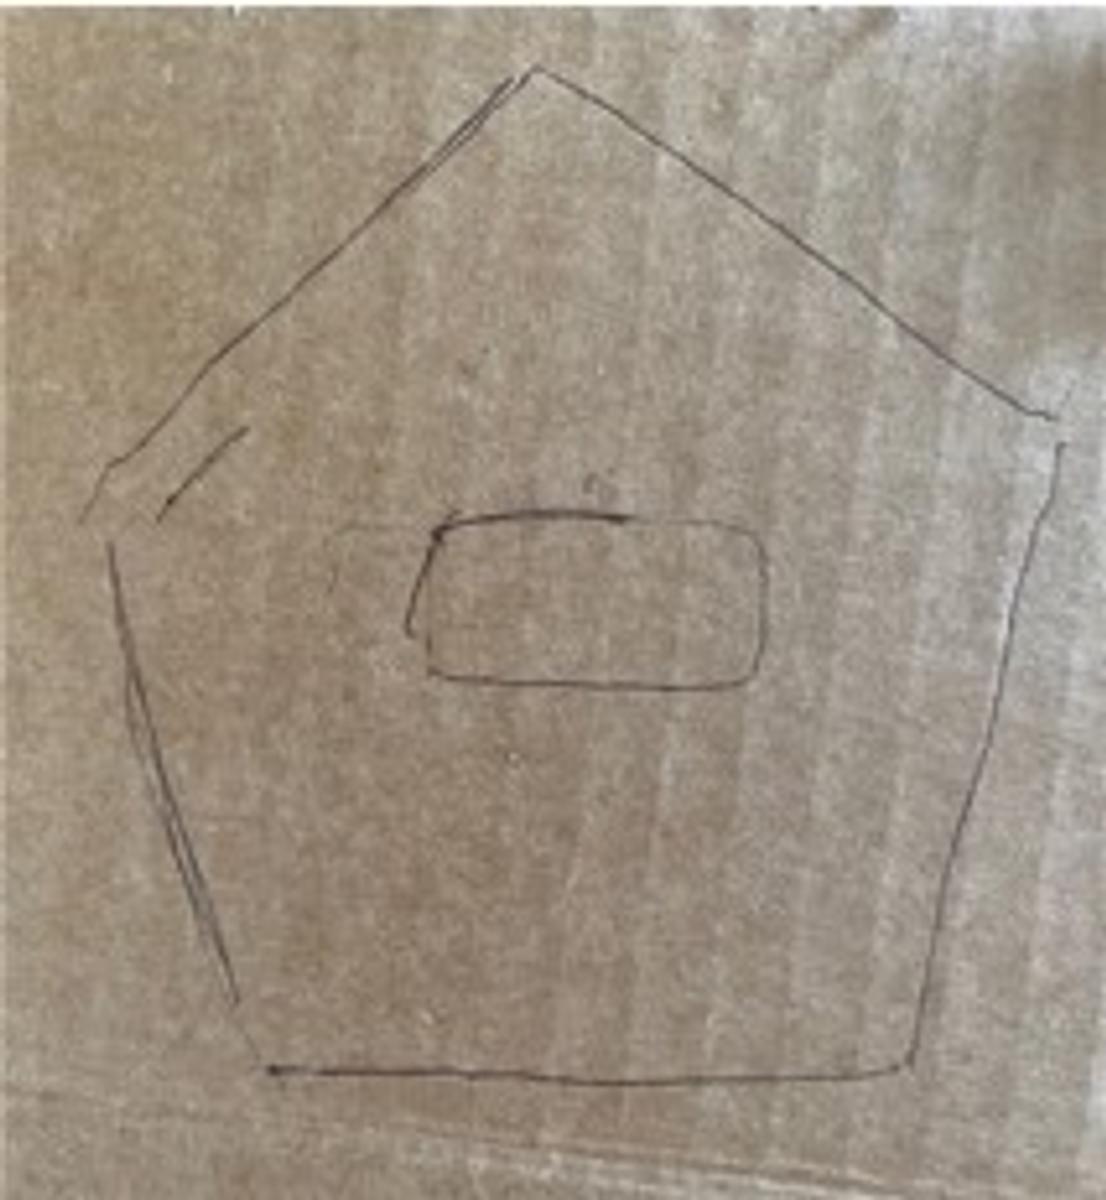

Step 6 Step 7 & 8 Step 9
Place one of the shapes on a Make base pieces; draw Stick the base onto the
paper towel roll and start 5 pentagons, 6cm each middle, on top of the
sticking pieces together with side with a small empty space.
PVA glue and use double- rectangle in the middle.
sided tape to secure the Cut out each of the pieces
pieces together. and stick them together.

Step 10
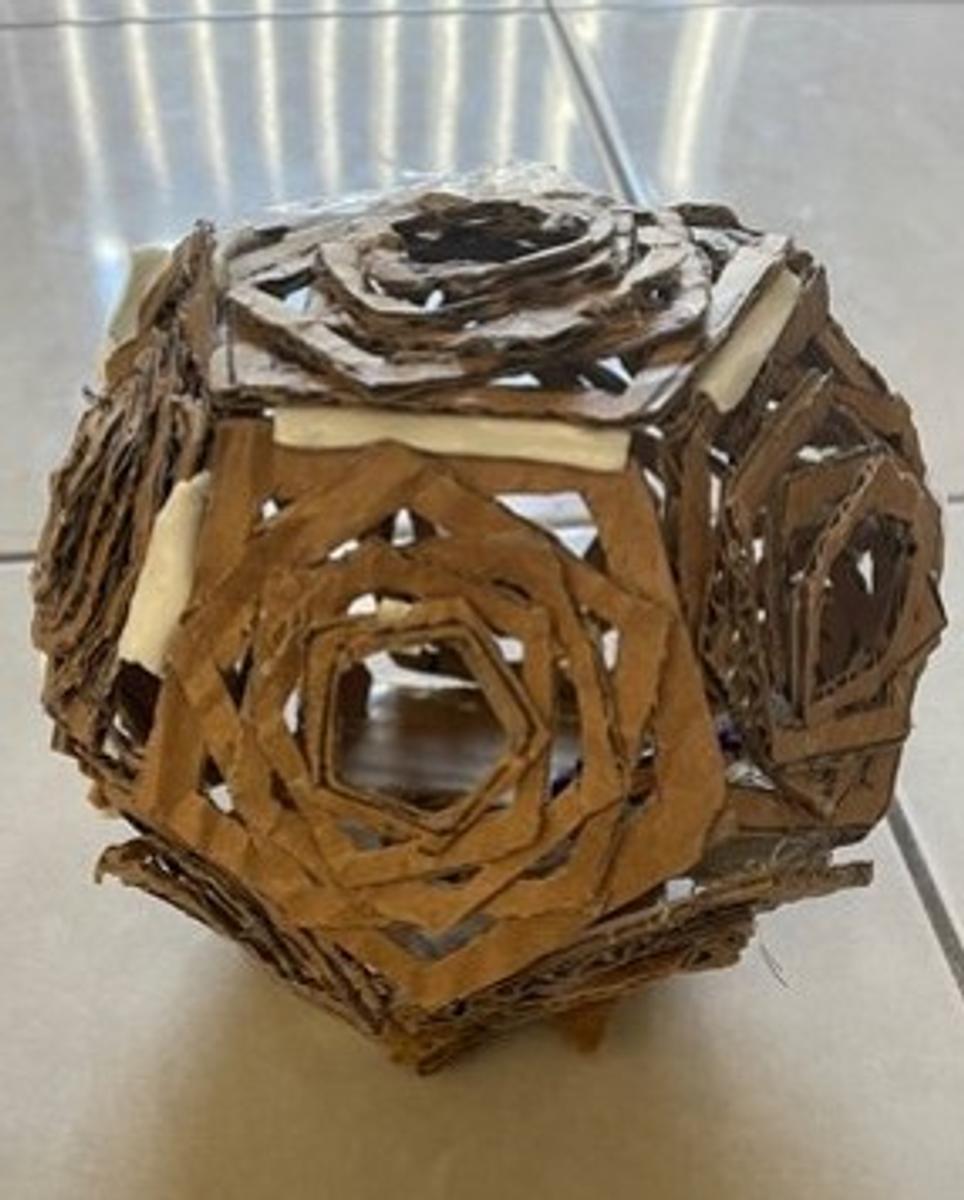
Insert light through the cut rectangle on the base and turn it on then, flip it upside down so it stands on its base.
Production

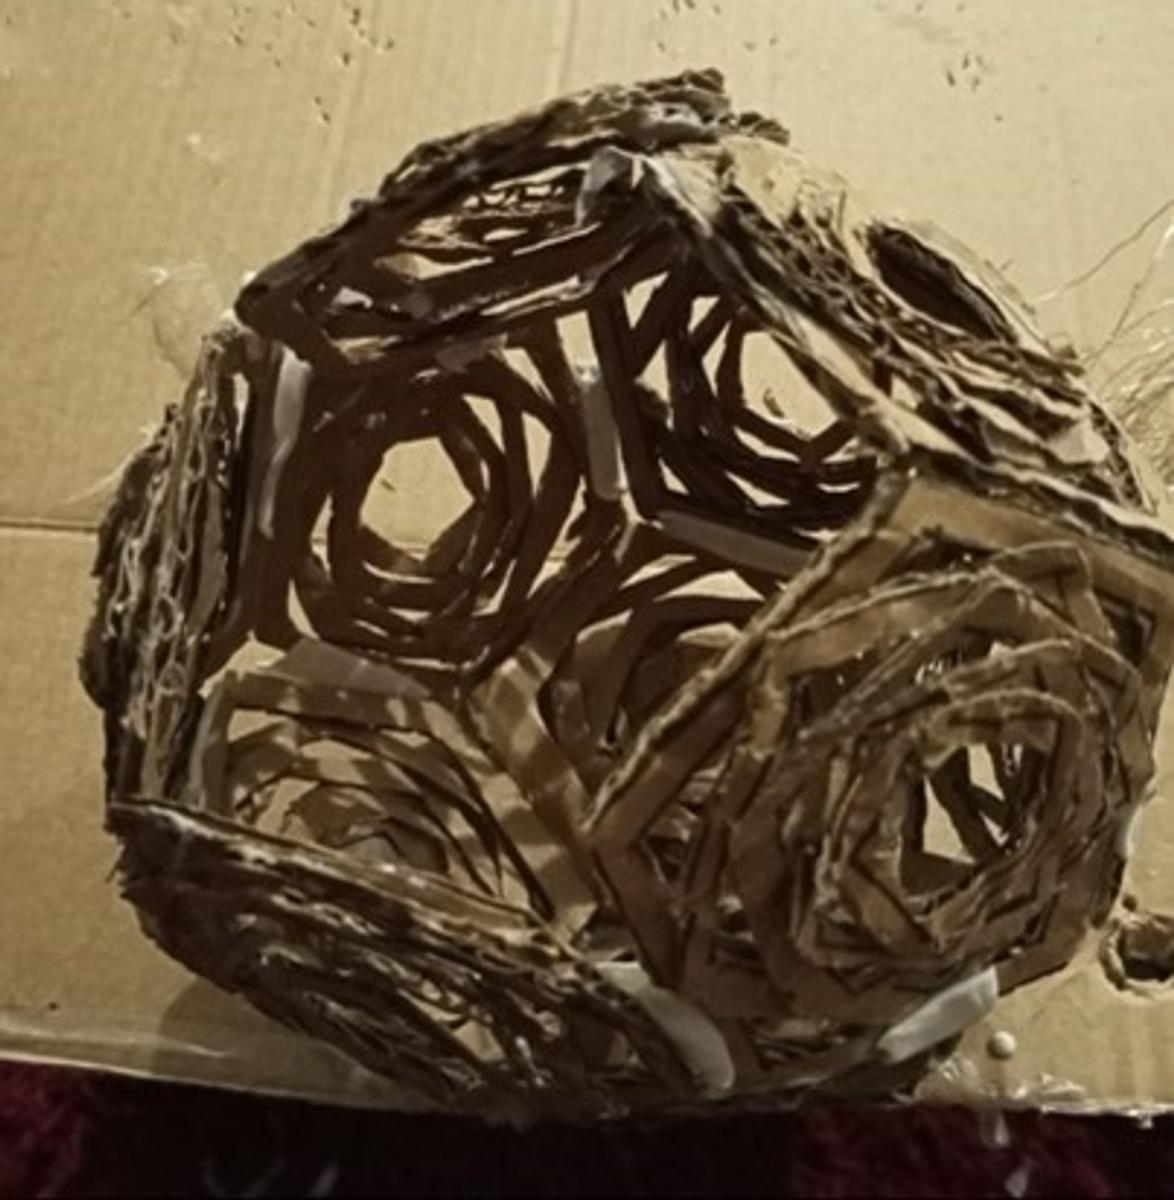
Result


Evaluation (one lesson)
What did you enjoy doing the most in this project?
I enjoyed connecting all the pieces together the most.
What things did you find the hardest about this project?
The thing I found the hardest was making the pieces stick.
What would you do differently next time?
Next time I would use a hot glue gun instead of PVA, so it sticks better.
What new skills did you learn?
I learnt how to perfectly draw pentagons and how to make pieces of carboard stick together using PVA.
Self-Evaluation
Give yourself a mark out of 10 for each of the following criteria:
Independence of work: 10/ 10
Quality of the final product: 9/10

Vijee Srirangarajah
8G
BIKE RAMP
Production photos
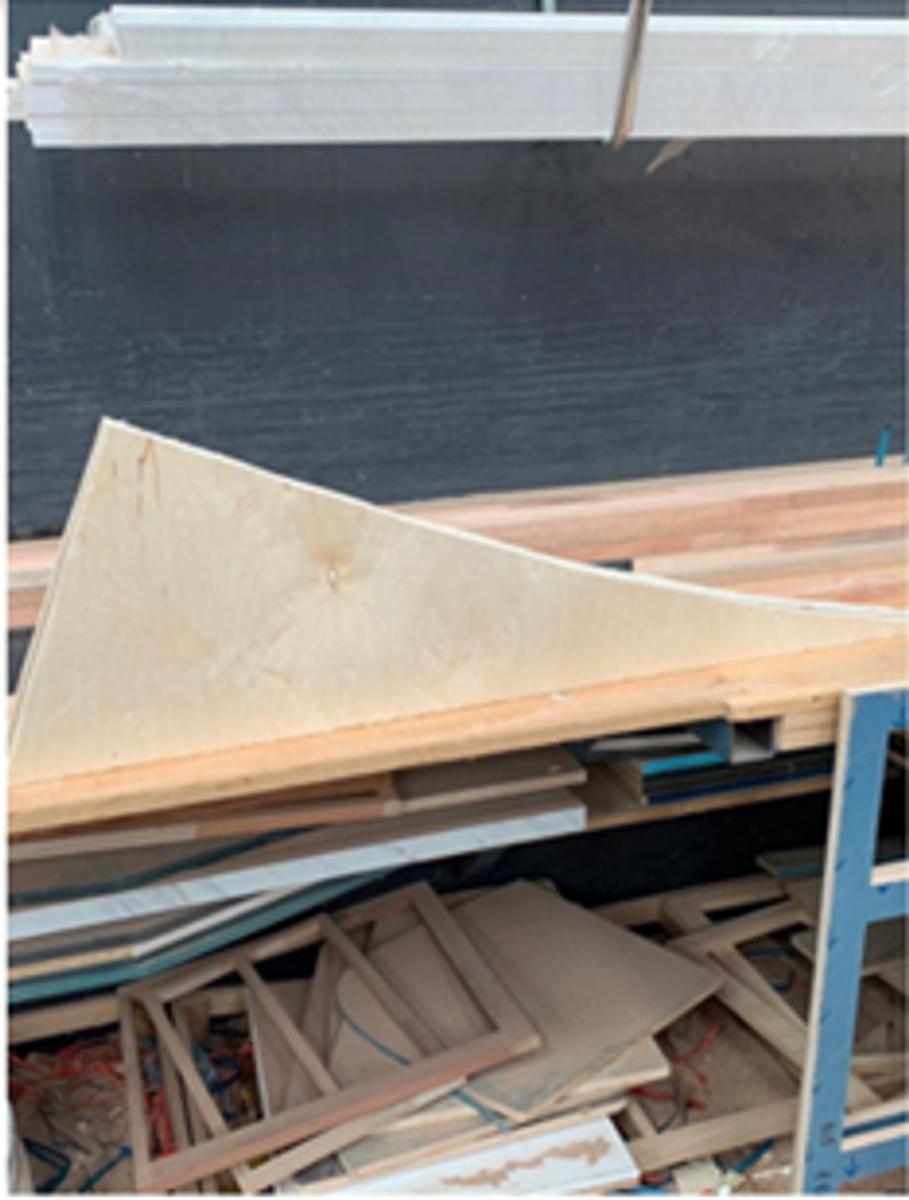
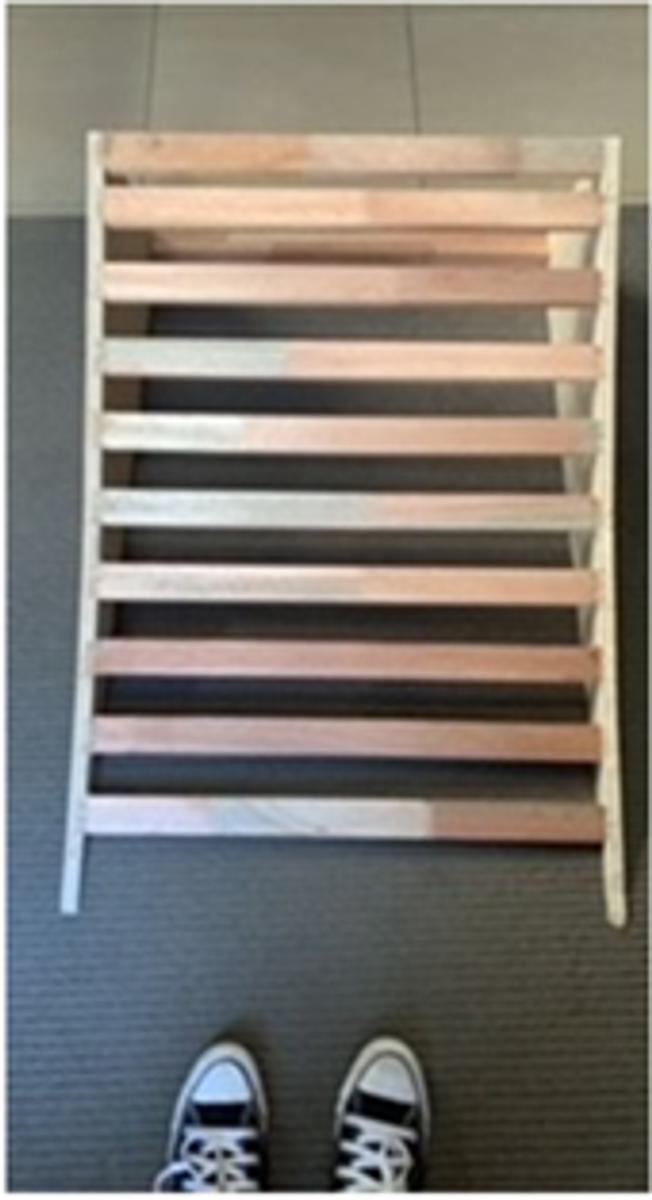

Before Middle End
2 side pieces 2 side pieces Final Bike ramp
with slats
Madison Dumaloski
7H
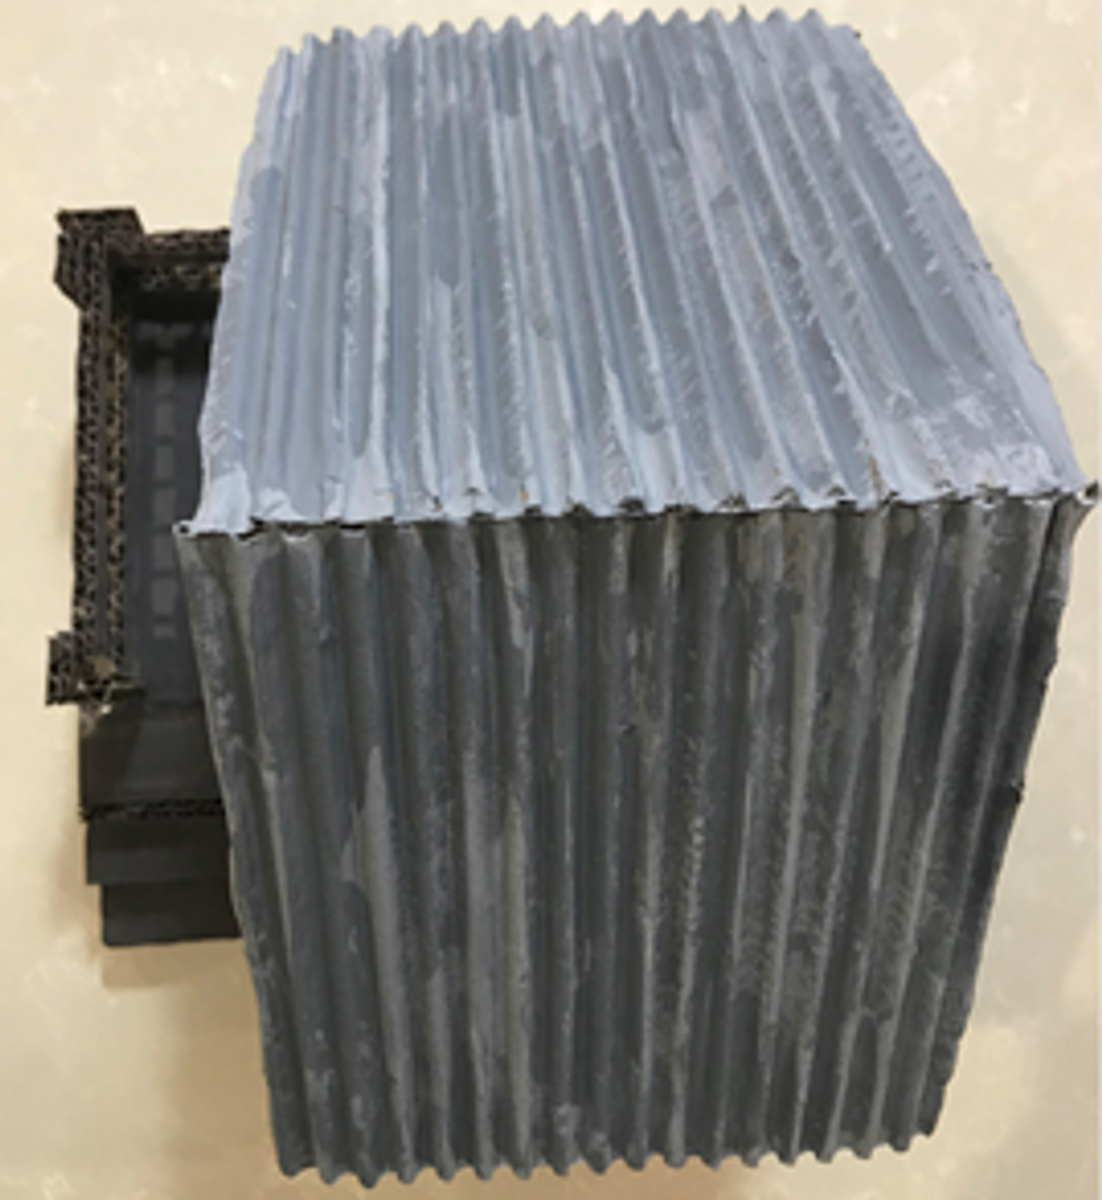
BEACH HOUSE
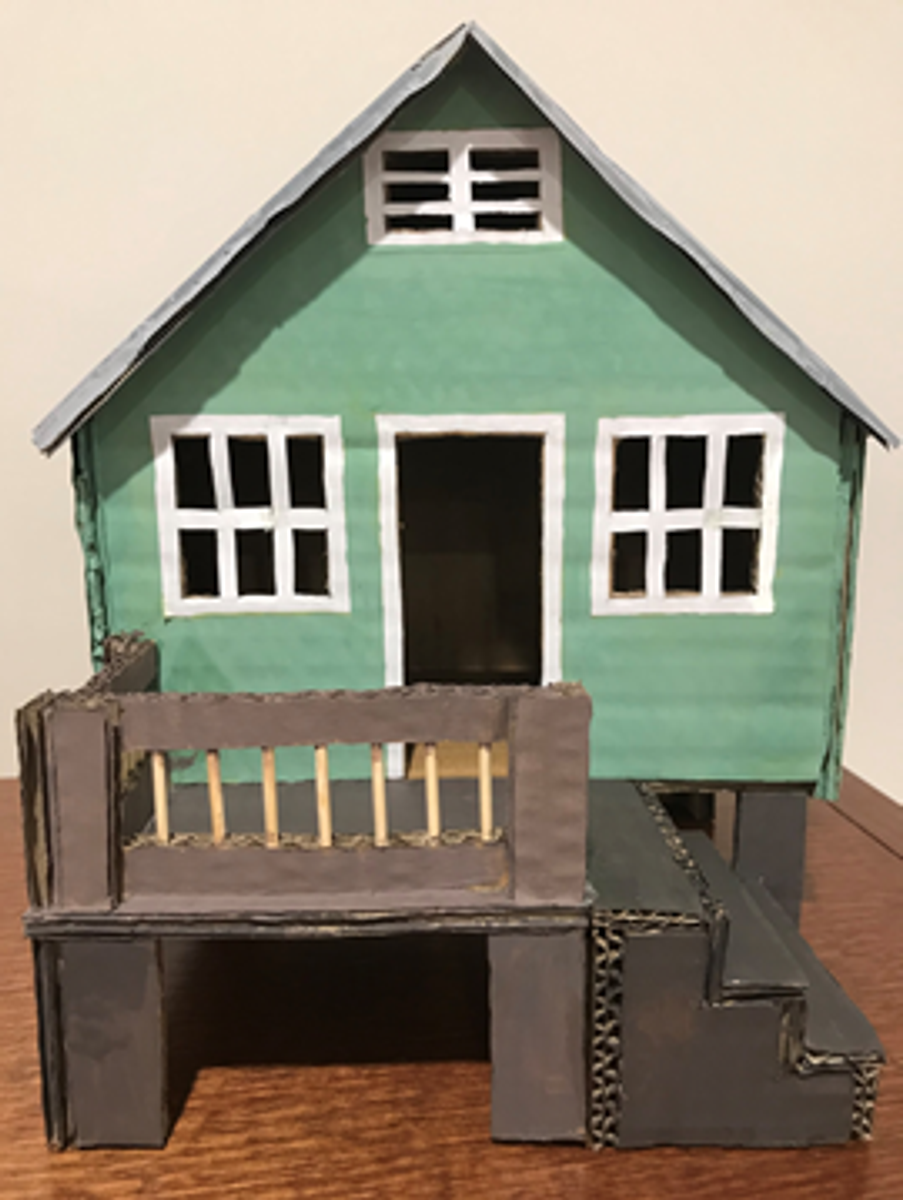

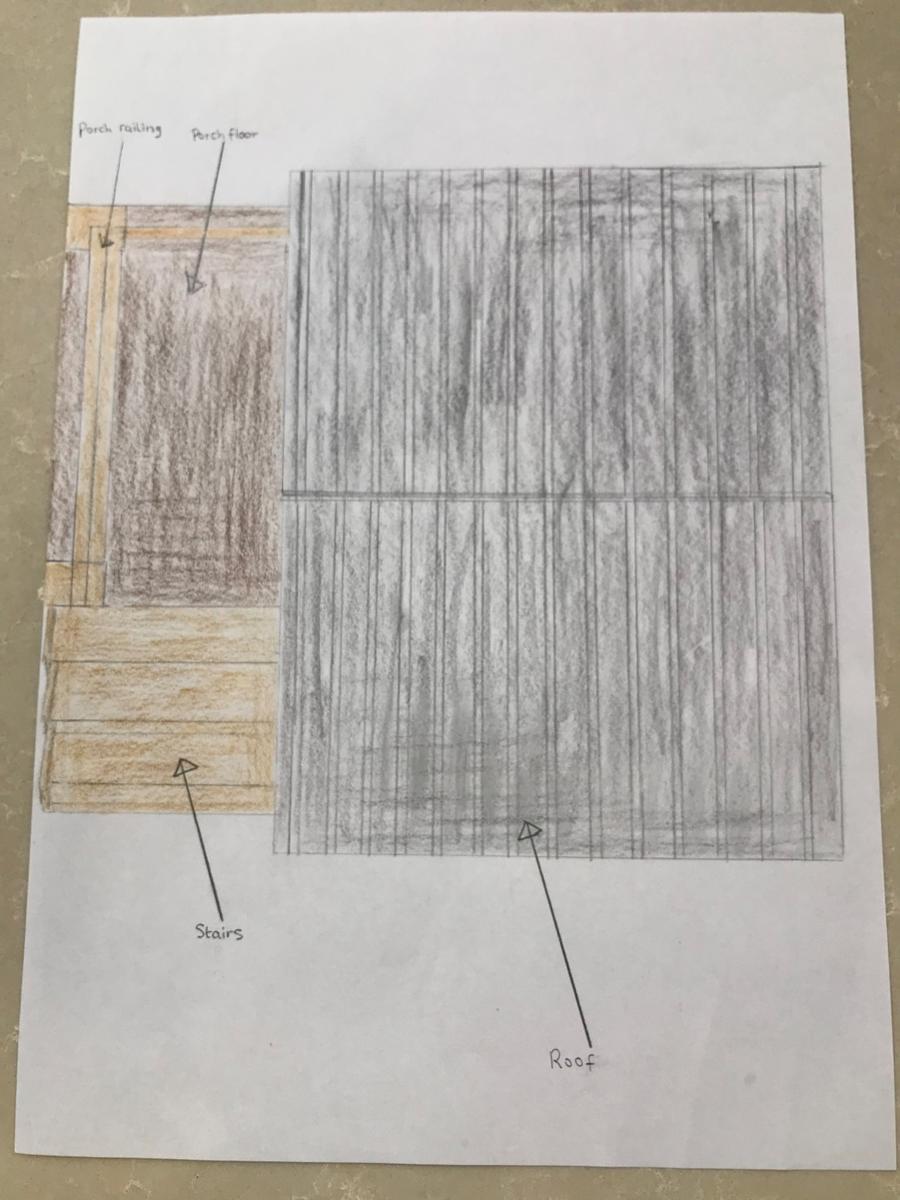
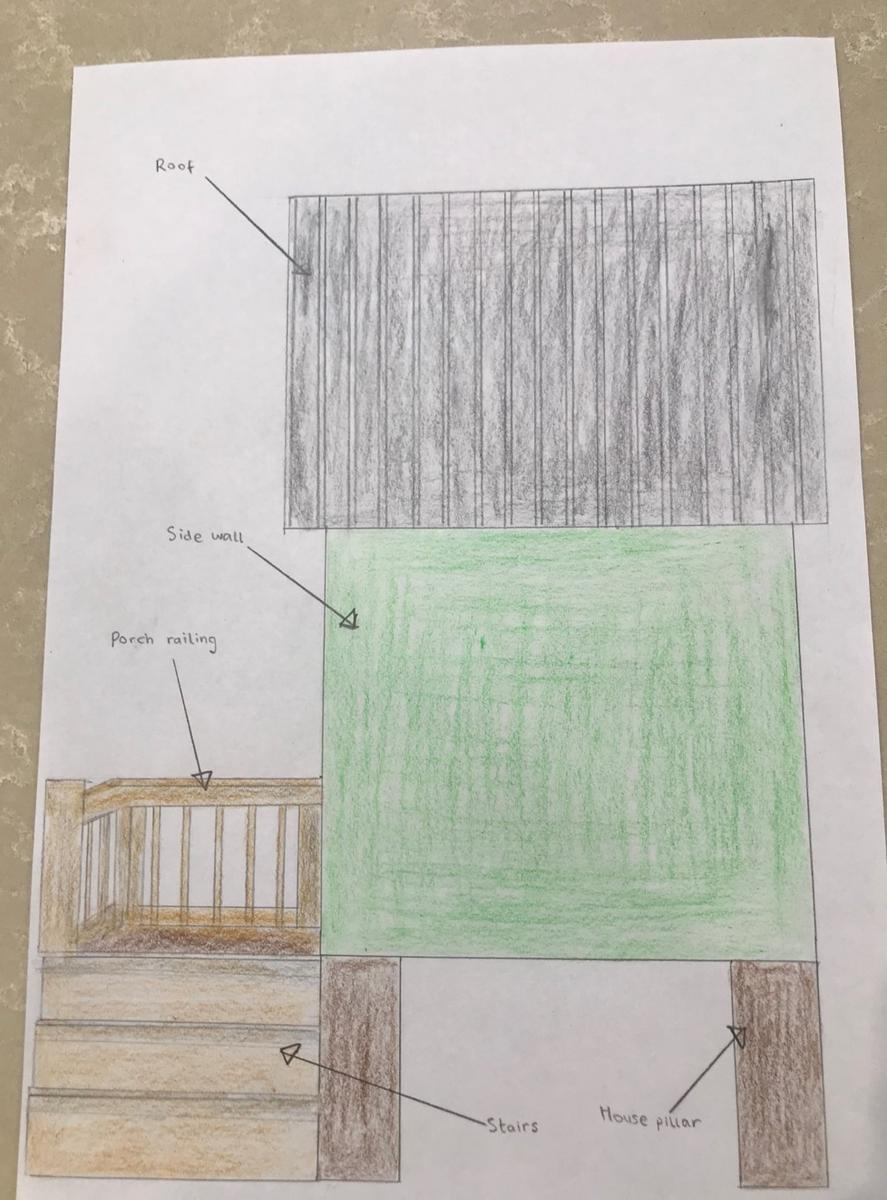
Three Sketches (Front, Top and Side Views)
Front Top Side

Production Plan
Equipment / Materials:
- Plain cardboard
- PVA glue
- Ruler
- Sharp knife
- Paint
- Paint brushes
- White paper
- Pencil
- Skewers
- Scissors
Safety Precautions:
- Be extra cautious when using a sharp knife to cut the cardboard.
- When painting and gluing cardboard, be careful as it may make your clothes dirty.
Method:
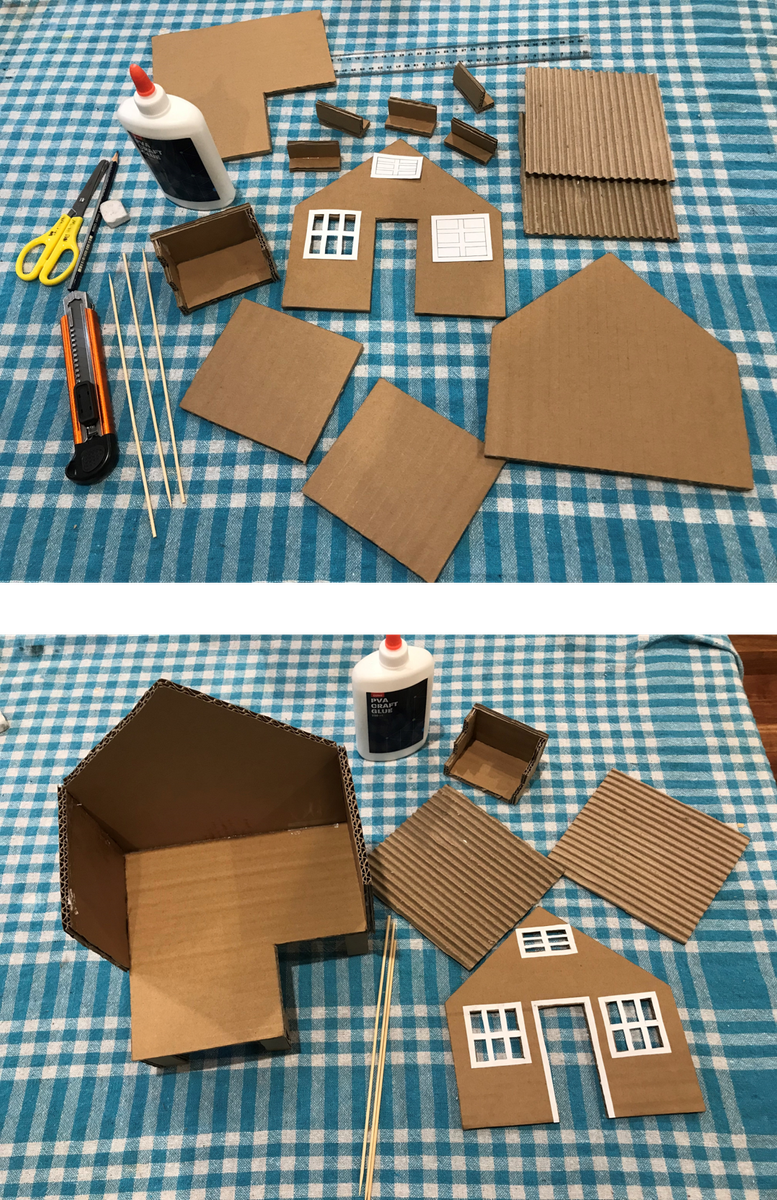
- Firstly, using plain cardboard, cut the base of the house (20cm by 20cm, then cut a small piece in one corner, which is 8cm by 8cm), pillars lifting the house up (5cm by 2cm), roof parts (14cm by 15cm each), walls, stairs and the railing for the porch.
- With the front wall of the house, use a sharp knife to cut out the shapes of the door and three windows. Then using white paper, cut out the window and door outline and paste onto the front wall of the house with PVA glue.
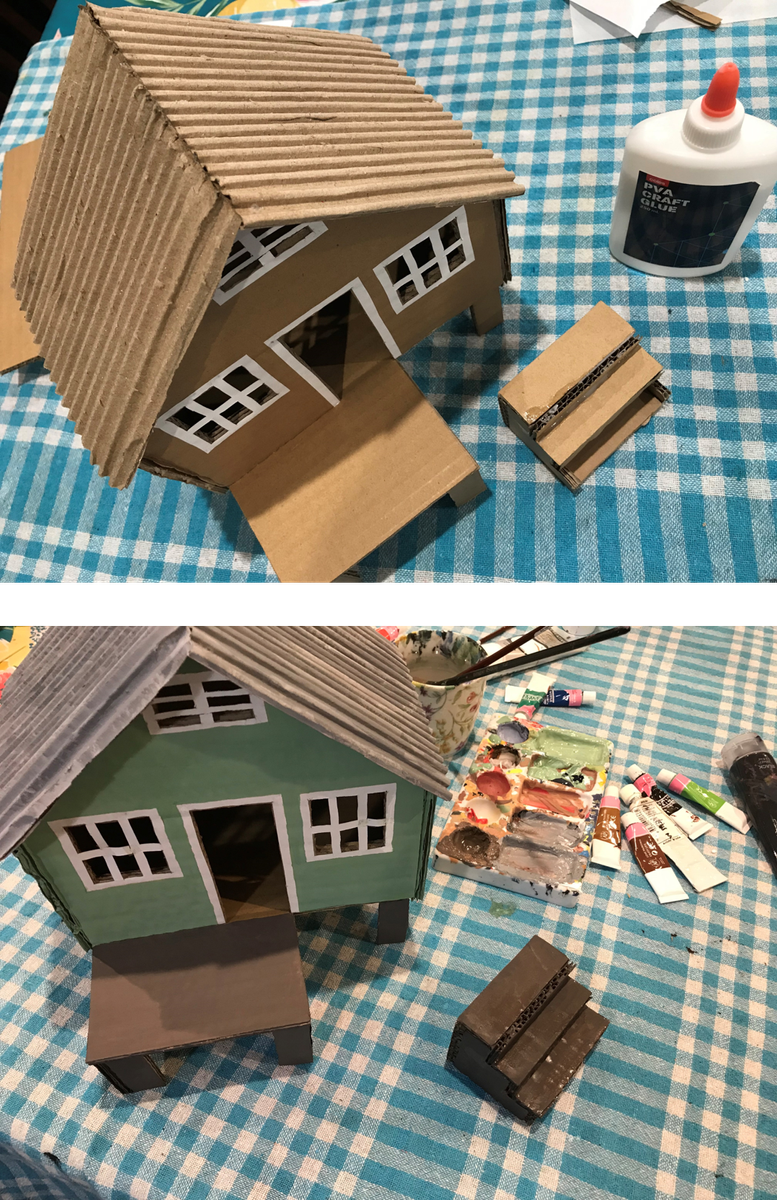
- Now that all the pieces are cut out, assemble all of them to form the shape of the house, gluing the pillars to support the house floor first, then the walls, roof, stairs and porch railing (use small pieces of skewers for the railing) on the base.
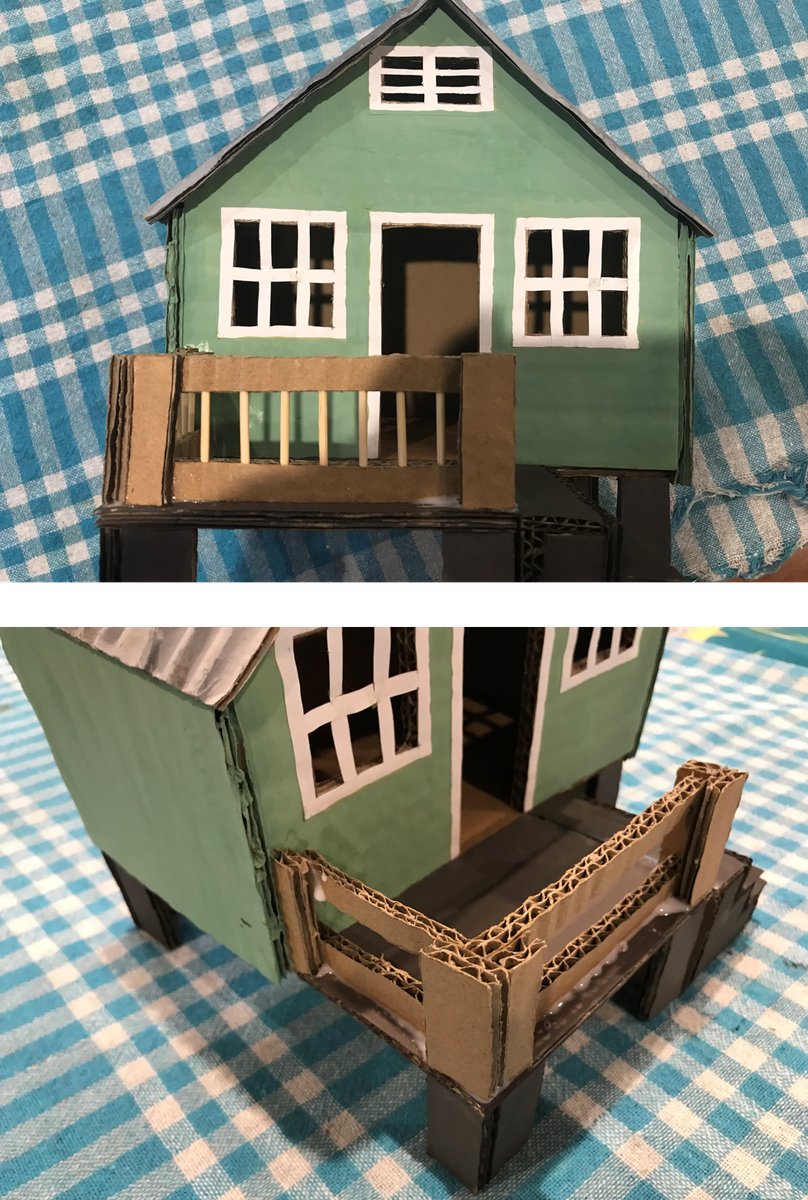
- After the house is assembled, paint the walls of the house in the colour light green, made by mixing quantities of the colours blue, yellow, green and white. Then paint the roof grey with some shading and the porch brown.
- Enjoy the completed house!
Finishes:
Paint the house to make it more realistic and for it to stand out.
Three Photos Along the Way
Beginning Half Way End
Evaluation Information
What did you enjoy doing the most in this project?
I enjoyed mostly everything in this project, however, my favourite part was gluing all of the pieces together to form the house. I also had a lot of fun choosing different colours for the house and then painting all of the areas to make it more colourful and stand out.
What things did you find the hardest about this project?
One thing I found most difficult about this project was some of the cutting with the sharp knife and assembling all of the cardboard pieces together to form the house. Sometimes the pieces did not stick properly and fell apart especially if not given enough time for the glue to dry first. Also, when painting it was a bit challenging to be precise, not going over the outline of the windows and door and covering all of the areas.
What would you do differently next time?
If I were to make this house again, I would use even more materials to make it, possibly make the house larger in size with two floors and add other fun features such as a swing at the front of the house or even a pool next to it.
What new skills did you learn?
I learnt and applied various skills throughout this project. These include measuring and sketching / drawing, cutting different pieces of cardboard, connecting cardboard with glue, mixing different colours with paint and also painting with even brush strokes and going in one direction.
Self-Evaluation
Give yourself a mark out of 10 for each of the following criteria:
Independence of work (1 - Someone else did all the work…….. 10 – You did all the work).
For the independence of work, I give myself a 9.
Quality of the final product (1 - Poor……... 10 – Excellent).
For the quality of the final product, I give myself a 10.

Katerina Miloseski
7F
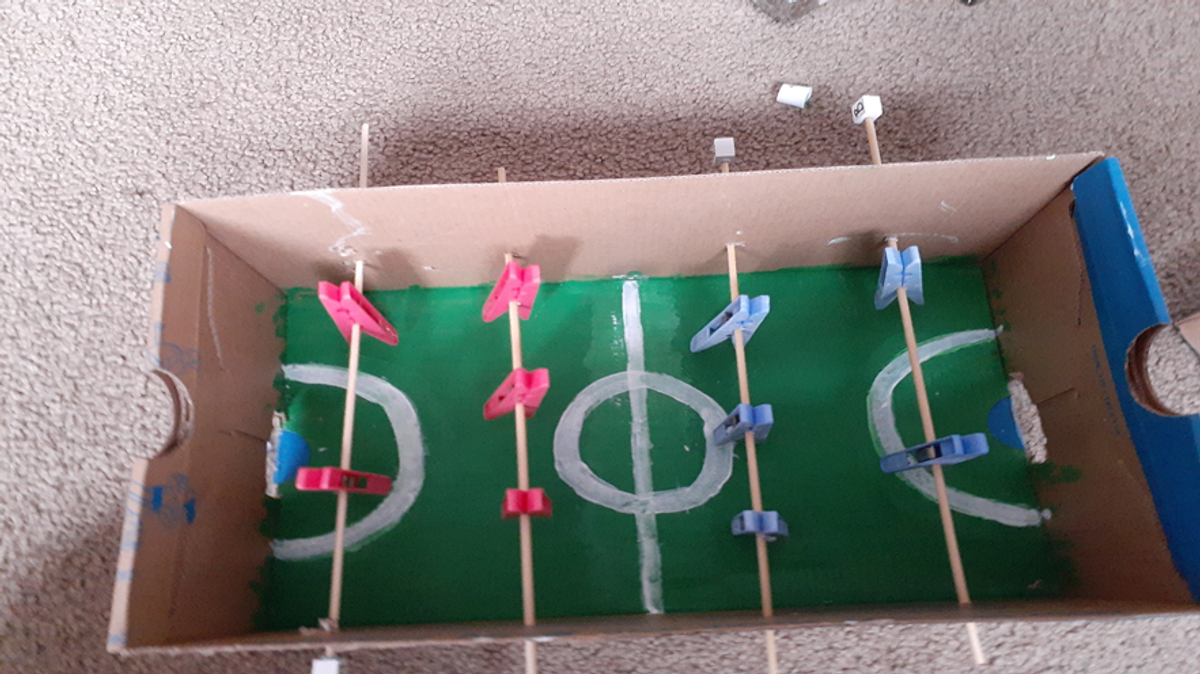
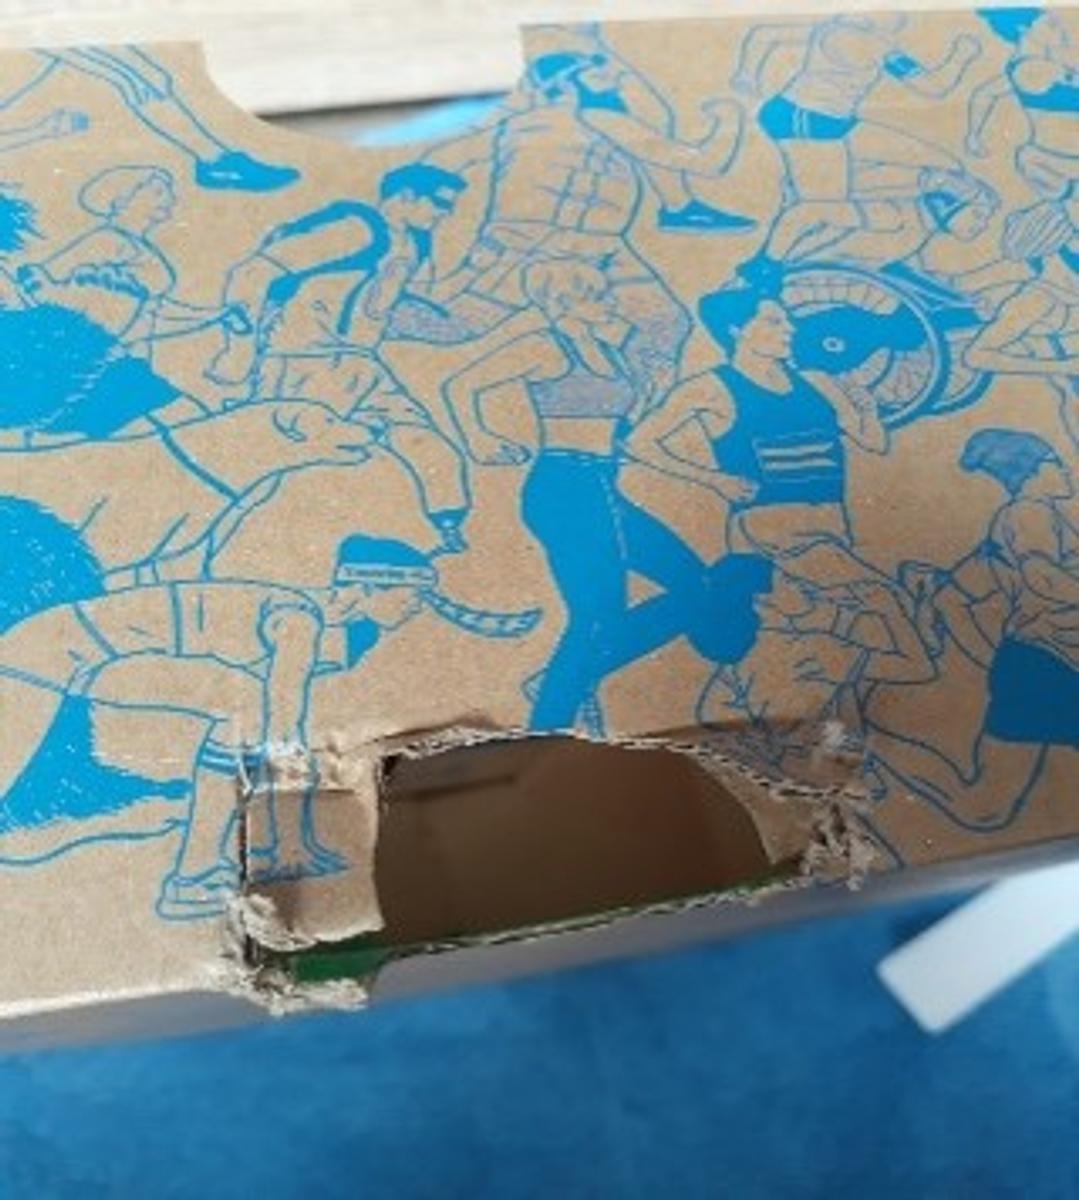
FOOSBALL TABLE
I chose to make a foosball table
Materials
• Hot glue gun
• 4 skewers
• A shoebox
• Green and white paint
• A paintbrush
• Scissors
• 5 Blue pegs
• 5 Red pegs
• Two Beads with the letter B
• Two Beads with the letter R
• Paint pallet
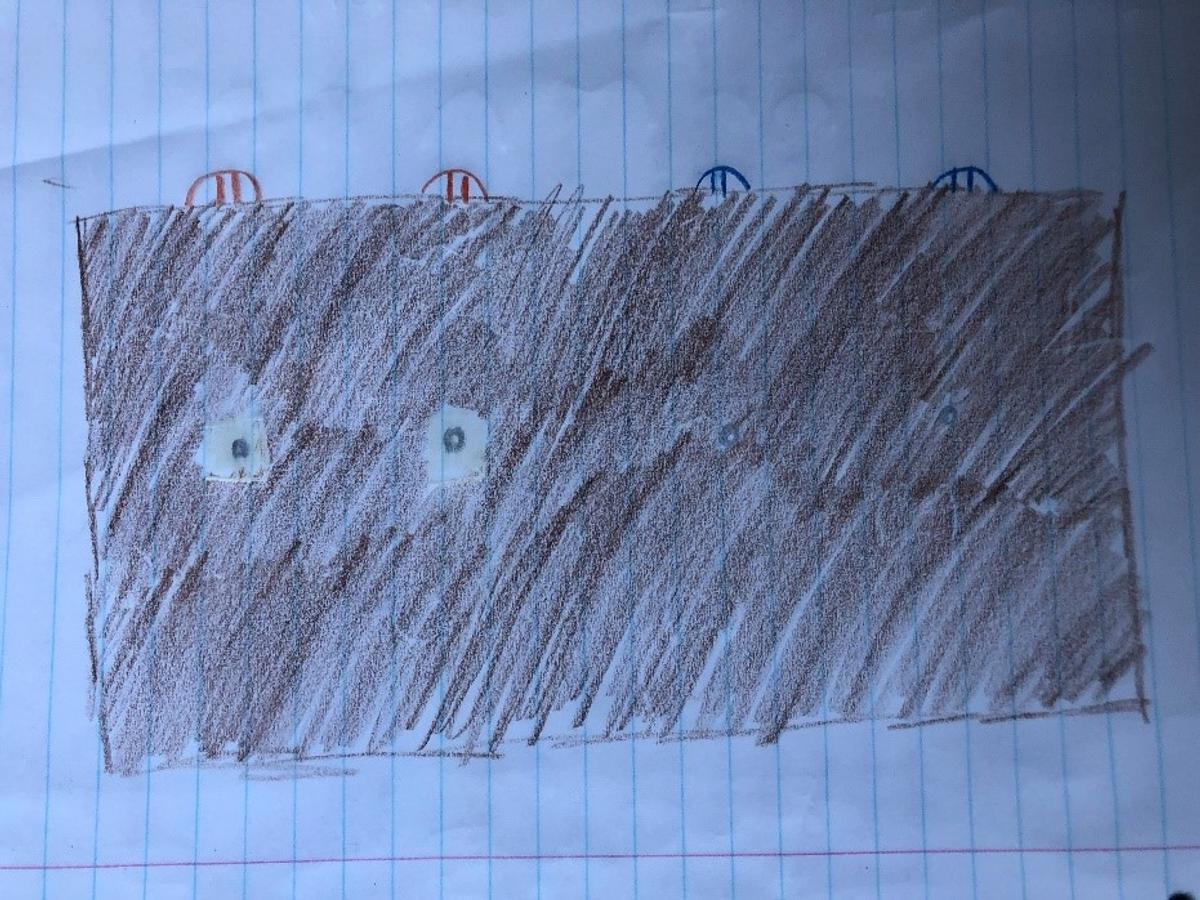
Foosball Table Sketches
Front Side Top


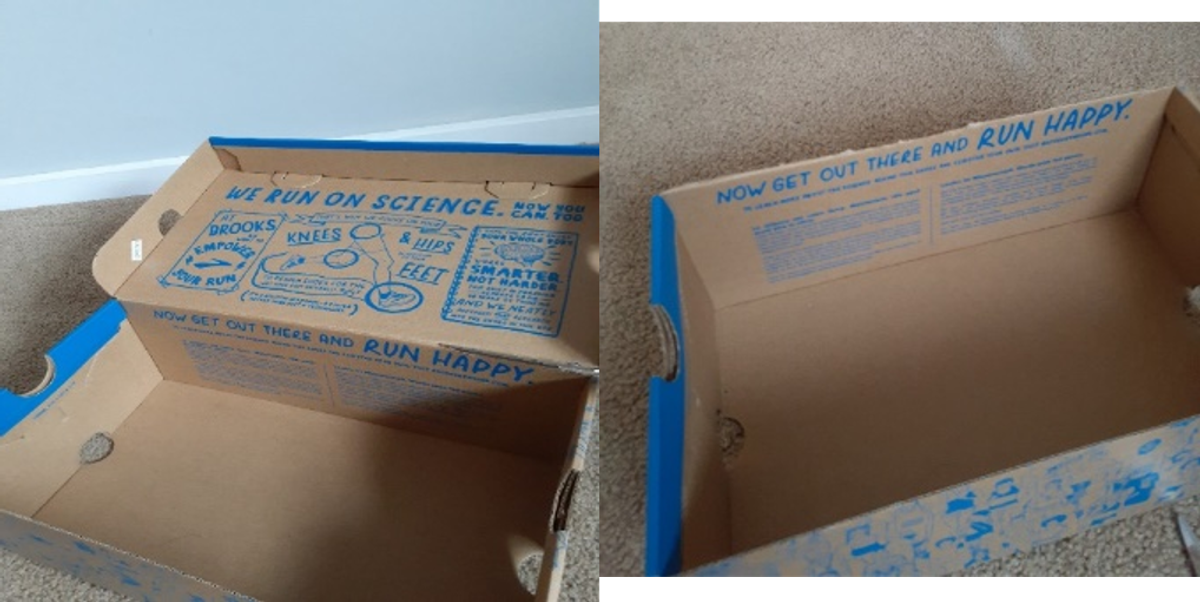
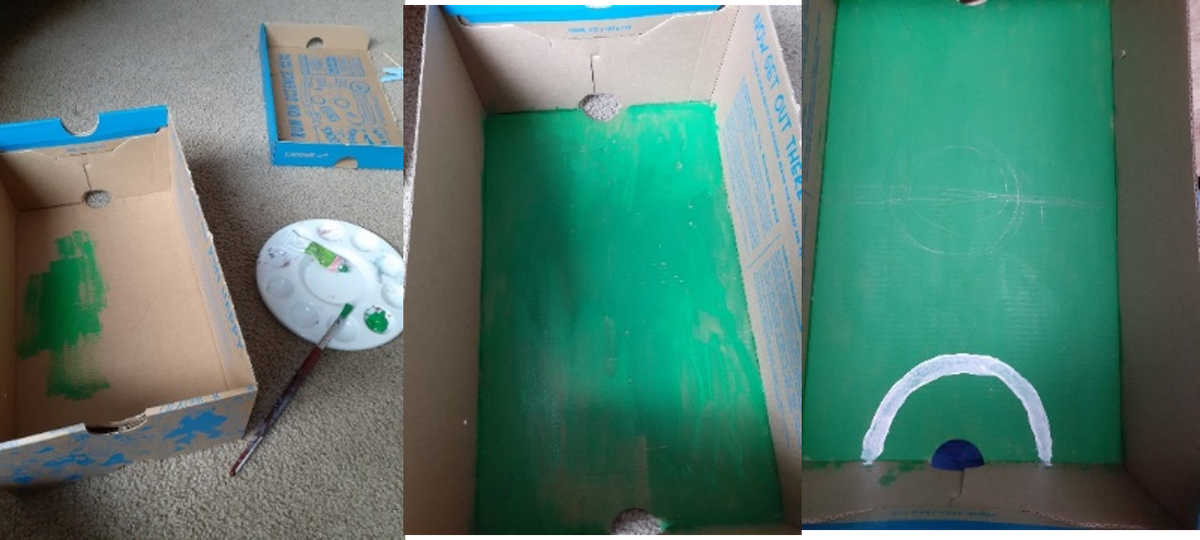
Cut off the lid of the shoe box so then Then paint the bottom of the shoebox with
when you play foosball it doesn't get in green paint. When it’s dry go over with
the way. another coat of green. Then with a pencil and a ruler map out how you want the soccer pitch to look like. Then use the white paint to go over the drawn lines. When it’s dry go over with another coat.

Now make a marking on booth short Then rule out where the arms also
sides, and cut it out the goal. It’s up to known as skewers are going to be
you what size want it, but make sure placed. Make sure they are evenly
that what ever your using for the ball spread out. It may take multiple times to
can fit through it. find the right spot. When happy stick the
skewer in the selected places.

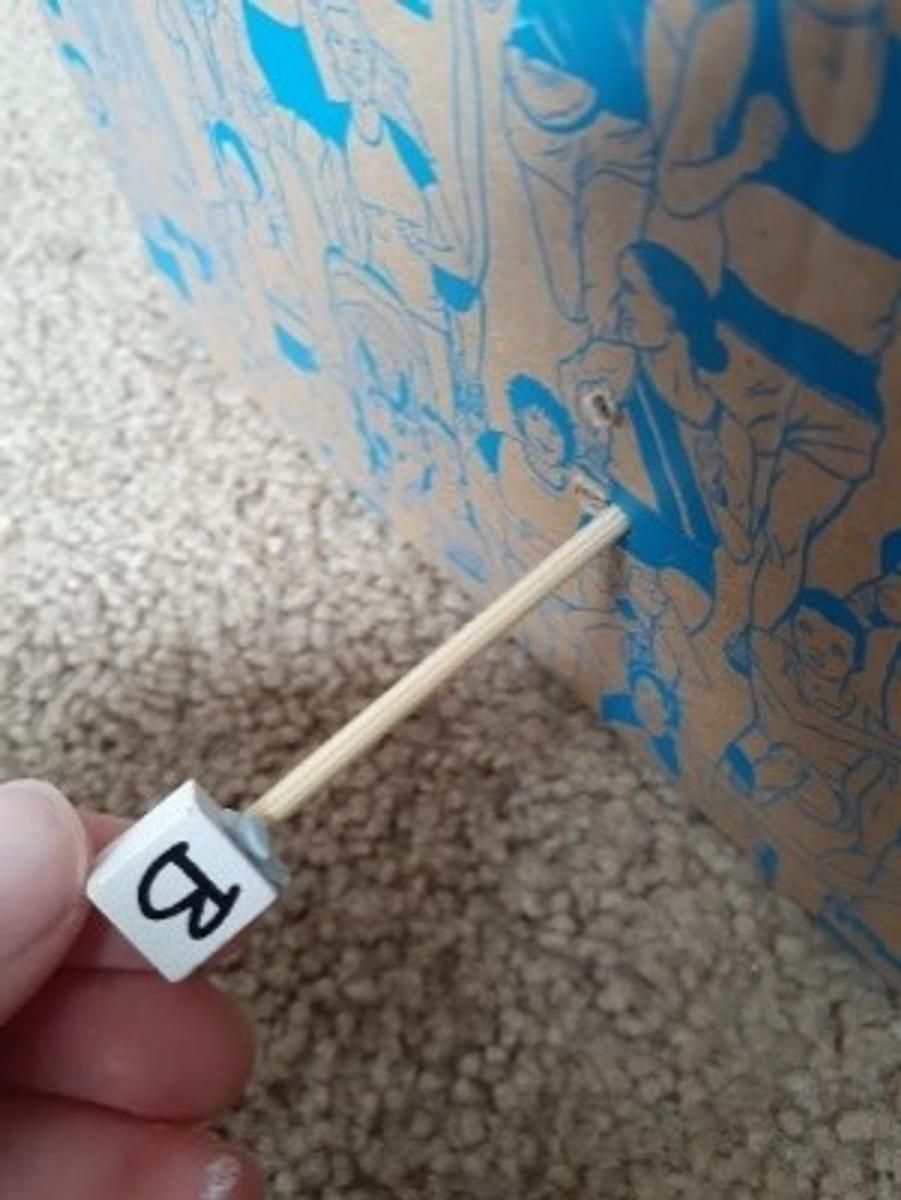
Then clip 3 pegs in the middle 2 skewers Then stick the letters on the pointy ends
(red and blue) and 2 pegs on the outer of the skewers by using the hot glue to
skewers (red and blue). Remember to stick it. The letter represents the peg
spread them out evenly. Make sure the and the colour of the team.
pegs don’t scrap the bottom of the shoebox.
If pegs are slipping the hot glue gun to stick
them on.

And then through all that the finished product should look something like this.
Self Evaluation
What did you enjoy doing the most in this project?
Painting the soccer pitch and using a hot glue gun.
What things did you find the hardest about this project?
Finding the right position for the skewers to go on the side of the shoebox.
What would you do differently next time?
Use a ruler to measure the skewers out evenly and use a box cutter to cut out the goals.
What new skills did you learn?
How to use a hot glue gun.
Independence of work (1 Someone else did all the work …………….... 10 - You did all the work).
I would say 10 because I did it all myself without help.
Quality of the final product (1 Poor …………………………….... 10 - Excellent).
I would say a 6 because it was kind of sloppy and rushed.
Anika MacDonald
9G